
Arizona Hiking Guide | Cap Puckhaber
Welcome to my Arizona Hiking Trail Guide, which covers my trip to the Grand Canyon. It was very first experience doing a true backpacking trip. I purchased my backpacking backpack, tent, sleeping bag, sleeping pad, and stove and never looked back. This was the trip that started it all. I hope to go back soon with my wife.
A Winter Hike into the Grand Canyon
Your Grand Canyon Winter Day Hike: Don’t Let The Scale Intimidate You
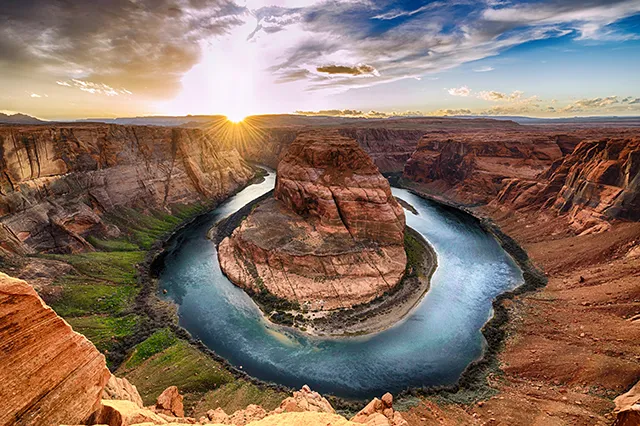
You are probably standing at the South Rim right now, looking over that impossibly vast, humbling canyon for the very first time. You are likely feeling a serious mix of awe and anxiety about hiking down into that massive void. If you are a beginner hiker feeling intimidated, you are absolutely not alone in that feeling. You can completely tackle a winter day hike here, but you really cannot treat this journey like a simple stroll through the woods. This environment demands respect, solid preparation, and a whole lot of careful planning before you even take your first step down.
Why Winter Is Actually the Best Time to Go Down
A trail guide to Arizona must discuss the Grand Canyon. My winter descent was the deepest challenge I ever faced. It was also the most thrilling personal trip. That specific journey sparked all my serious backpacking adventures. It showed me how much more I could handle. The quiet beauty of winter makes this possible. Most people visit when it is scorching hot. The canyon gets unbelievably crowded then. Choosing winter is a smart, calculated move.
The South Rim is seven thousand feet high. This elevation means cold and snowy weather up top. When I was there, snow covered the whole area. This gave the canyon a majestic, quiet feeling. You truly will never forget it. The air felt crisp and invigorating. Temperatures near the top ranged from thirty to fifty degrees Fahrenheit. My partner and I began our deep descent. We actually felt the weather change dramatically. Temperatures rose considerably by our turnaround point. It often hit a pleasant sixty degrees inside. This is perfect hiking weather. This serious temperature swing impacts your gear and hydration plan.
The Hard Truth About Hiking The Inversion
We have to be real about this lesson. The Grand Canyon is not a mountain you climb. The hard part of a mountain hike is climbing up. The reward is an easier walk down from the summit. Here, you get the fun, easier part first. Every step down becomes a debt. You absolutely must pay that debt later. This happens when you climb back out to the rim. It is a complete inversion of the typical physical challenge. Your preparation must be spot-on before this adventure. We are talking about an extreme elevation difference. This drastically impacts your muscles, gear, and mental state.
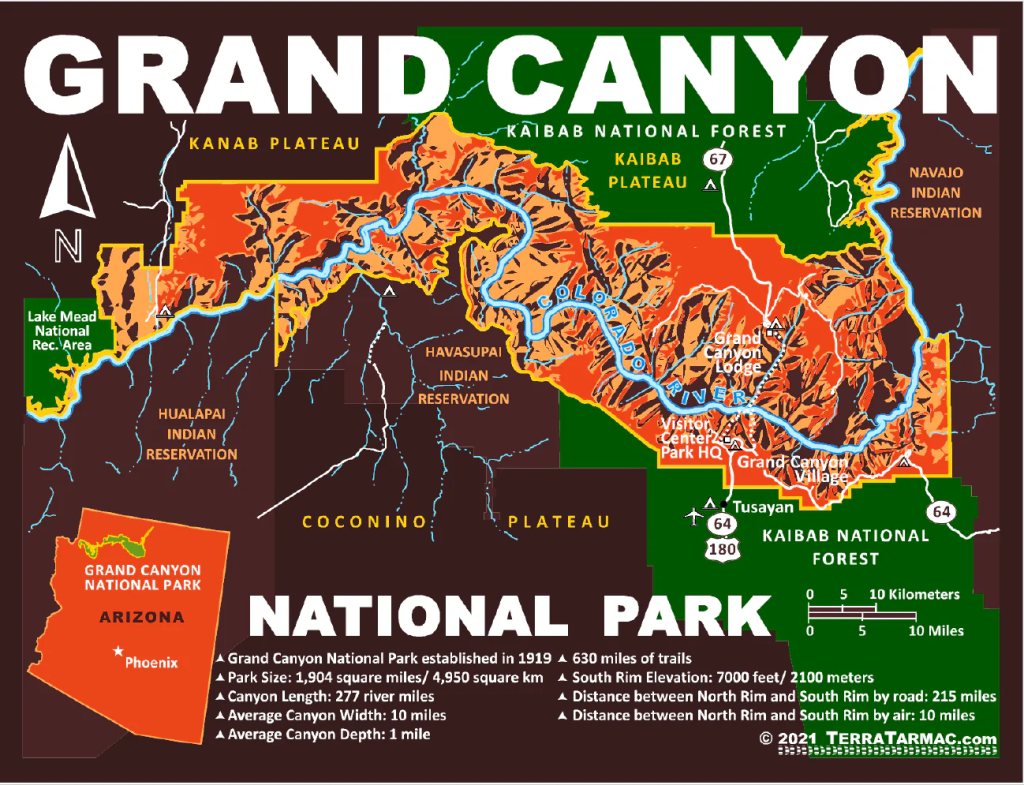
You will enter Grand Canyon National Park through the main South Entrance. This gate is right near Tusayan, Arizona. Getting to the main area is very straightforward. You must check the official NPS website for current fees and passes. This ensures you have the latest entry information. We only planned a day hike. No official backcountry permits were required for us. You must secure an overnight permit well in advance. Plan months early if you camp inside the canyon. You should be able to drive to the South Rim Visitor Center. Parking is generally readily available in winter. This is a massive relief compared to the crowded summers.
Choosing Your Route: Bright Angel or Kaibab
Deciding which trail to take is a huge decision. My personal experience offers the best guidance here. My partner and I chose the South Kaibab Trail for our descent. To be completely honest, it begins with a very steep drop. You immediately descend a series of unrelenting switchbacks. It feels like a vertical staircase in some sections. Yet, it offers spectacular views right away. The terrain shifts quickly here. You move from snowy pine forests at the rim. This changes to a rocky, dry desert landscape below.
The iconic Bright Angel Trail is a great option. It is probably better for true beginners. It offers far more shade as you go. Crucially, it has seasonal water stops. This is a huge advantage over the South Kaibab. It is also a little less steep overall. However, it offers less dramatic views initially. I chose South Kaibab for the amazing panoramic views. I knew I could manage carrying all my own water. True beginners should consider the Bright Angel Trail. Choose it if you plan to hike deeper than a few miles. This is especially true in the cold off-season.
Your Essential Gear Layers
I offer you one simple, important fact. You must be prepared for extreme conditions on this trail. Be ready for bitter cold and snow at the rim. Be ready for warmer, drier air further down canyon. It is absolutely crucial to wear layers. Pack a very specific set of gear for this wild trip. The desert environment is very demanding. Things break easily here. The weather turns quickly. Help is often many hours away. You must be entirely self-reliant.
My personal system uses a simple three-layer approach. You cannot skip this step. First, wear a good wool or synthetic base layer. This layer goes right against your skin. It pulls sweat away from your body. This is its most important job in cold weather. Sweat feels cooling while you move. But when you stop, that moisture chills you quickly. This leads straight to hypothermia. Secondly, wear a fleece jacket as your insulation layer. Wear this over your base layer. This layer traps air to keep you warm. You will rely on it for heat regulation. Finally, the outermost piece is your protection layer. This must be a lightweight shell. Make sure it is waterproof and windproof. This piece shields you from snow, wind, and unexpected rain.
Traction, Water, and Electrolytes
You absolutely must include microspikes in your pack. I consider them non-negotiable for this trip. The trail near the rim gets sun all day. This melts the packed snow easily. It then immediately freezes overnight. This forms treacherous, slick ice. These traction devices are simple chains. They have metal spikes, slip right over your hiking boots, are not heavy mountaineering crampons and are essential for navigating icy sections. Use them in the early morning especially. The sun has not yet hit those steep switchbacks. Do not go down the upper sections without them. I have seen too many people falling. They thought regular hiking boots were enough.
We also need to discuss your water plan. There is absolutely no water available on the South Kaibab Trail. You must carry every drop you need for the entire day. I carried a hydration pack with three liters of water. I also packed a small water filter for emergencies. Seasoned pros recommend this safety net. Water alone is actually not enough to keep you safe. You sweat out vital electrolytes for hours. Electrolytes are essentially salt. Drinking too much plain water is dangerous. You can develop a condition called hyponatremia. This is the opposite of dehydration. NPS rangers stress this point often. Always check the NPS Key Hiking Messages page. Do this before heading out.
The Relentless Climb Out: A Mental Game
The way back up will be absolutely relentless. It will be the hardest part of your day, is a continuous, punishing elevation gain, and it feels like an eternity. You move one foot in front of the other. The rim is seven thousand feet high. The canyon floor is much lower. This difference is incredibly taxing. You will feel every bit of that fatigue. The elevation change adds stress. You are already tired from the descent. The challenge is now severely compounded. This is due to the altitude. It is also due to mounting fatigue in your muscles.
Think of your energy reserves like a credit card. Going down the canyon is like charging up your card. That is the fun, easy purchase. Climbing back out is paying the bill. You must pay it with huge interest. Your only currency is pure, painful effort. Be honest about your fitness level. Know your firm limits before you climb. You must turn back when you feel exhausted. The canyon will wait for you tomorrow. There is no shame in stopping short of your goal. The only shame is risking a complicated rescue. Park rangers have a smart saying to remember. “There is no shuttle bus from the bottom of the canyon to the top.”
Training for the Inversion and Protecting Your Knees
You cannot just show up at the Grand Canyon. Do not expect to be fine as a beginner hiker. Your training must focus specifically on endurance. Work on your downhill control long before you arrive. Your quads and glutes will be screaming on the way up. They will feel intensely sore the next day. Find a stadium or a tall building nearby. Use a stair machine at your gym instead. Spend one hour climbing those stairs consistently. Do this three times a week. This perfectly mimics the canyon’s ascent. Focus on exercises like squats and lunges. Step-ups are also critical exercises. You are training your legs to handle the constant load. This means climbing thousands of vertical feet.
You need strong eccentric muscle control. This will protect your knees on the descent. Hiking downhill for hours can damage your knees. This happens without correct technique or gear. This is where your trekking poles become essential. They are your new best friend on the trail. These poles are vital for preserving joint health. They reduce the constant impact force. They distribute your body weight’s load. The load shifts from your knees to your arms. This saves you unnecessary pain and wear. Your poles act like a third and fourth leg. This gives you incredible stability on the trail. This is key on slippery or icy sections. Check the NPS Hike Smart page for advice. Look there for pacing and technique tips.

The Ten Essentials System: A Non-Negotiable List
You must be a stickler for minor planning details when you are preparing for a trip like this, and your authority on the trail comes directly from your commitment to safety. Hiking experts have developed the essential “Ten Essentials” system, and you need to treat this list like gospel truth for every single hike you ever take. My pack always has these items, regardless of how short or simple the day hike is going to be. Make sure you check off every single one before you leave the trailhead:
Navigation: Map and Compass
You need a physical map and a compass because they are absolutely non-negotiable tools to have with you on the trail. You should never rely solely on your phone because cell service in the canyon is unreliable, and your battery is guaranteed to die when you need it most urgently for safety. These analog tools will always work, regardless of the weather or your phone’s battery status, giving you a serious and trustworthy safety net.
Sun Protection: Hat, Glasses, and Screen
This absolutely means sunscreen, sunglasses, and a wide-brimmed hat for the trail and the serious exposure you will face on the hike. The sun is incredibly intense at altitude, even in the middle of winter, and the bright snow reflects it, giving you a serious double dose of UV exposure on your face and eyes. Protecting your skin and eyes is essential to avoiding severe fatigue and long-term damage during a full day on the exposed trail.
Insulation: Extra Layers
You must carry those extra layers we talked about in the layering section, including a warm hat, a pair of gloves, and a puffy jacket. Even if you start the morning feeling warm, a sudden change in the weather or an unexpected injury will require these pieces immediately for survival. Having these items ensures you can quickly regulate your core body temperature if you have to stop moving for a long period of time for any reason.
Illumination: Headlamp and Batteries
A headlamp with a fresh set of extra batteries is crucial if you get seriously delayed and have to hike out in the dark hours. The winter days are shorter than you think, and what you assume is a three-hour descent might turn into a very long six-hour climb out of the deep canyon. Being able to see the trail clearly and having your hands free to use your trekking poles is completely non-negotiable for ensuring your safety.
First-Aid Supplies
A simple but complete first-aid kit with blister care, pain relievers, and a small amount of antiseptic is a mandatory item to carry in your pack. You should also include any personal medications you might need for the day and know how to treat common hiking injuries like sprained ankles or deep cuts. Always carry and know how to use a few pieces of moleskin or blister tape, as blisters are the single most common issue on long and punishing descents.
Fire: Lighter or Matches
A reliable lighter or waterproof matches for emergency survival situations is something you should always carry, even if you do not plan to use them right away. You won’t be having a campfire, but fire is a non-negotiable survival tool for signaling or providing critical warmth if you have to spend an unplanned night in the cold. You can also use this tool to quickly light an emergency stove if you need to melt snow for a water source.
Repair Kit and Tools
Carry a simple multi-tool and a few strips of duct tape wrapped around a trekking pole or a water bottle for quick trail repairs. You might need to fix a broken boot lace, patch a torn backpack, or tighten a loose screw on your trekking pole system. Having these simple tools can often prevent a small inconvenience from becoming a serious, debilitating emergency on the trail.
Extra Food
Pack significantly more trail mix, energy bars, and salty snacks than you think you will need for the day’s journey down and back up. Your body desperately needs to replenish those lost calories and sodium to regulate your temperature and keep your brain sharp and focused on the task at hand. Always pack one extra emergency meal that you can rely on if you are seriously delayed on the trail and get a full-blown case of the “bonk.”
Extra Water/Hydration
This means your main hydration pack, your water bottles, and a high-quality water filter for true emergencies when you might need it most. Remember, your need for water increases drastically as the temperature rises and you exert yourself on the long, grueling ascent back up to the rim. It is far better to carry too much water than to risk severe dehydration in the arid canyon air for any reason.
Emergency Shelter
A lightweight emergency thermal blanket or bivy sack that you can use to protect yourself from wind and cold is a critical, often overlooked item for all hikers. If you get injured or have to wait for a rescue team, this small piece of gear will prevent hypothermia, which is the most common killer on the trail. It packs down to almost nothing and is worth every single ounce of weight it adds to your pack.
The Essential Rules of the Corridor
Remember that both the Bright Angel and South Kaibab trails are actively used by the famous mule trains throughout the year. When you encounter them, you must immediately move off the trail and stand perfectly still on the uphill side of the trail. Standing on the uphill side is crucially safer because it is away from the dangerous drop-off ledge that could cause serious injury. The mules always have the absolute right-of-way, so stand still and wait until the last mule is at least fifty feet past you before you resume your hike.
You must follow all Leave No Trace principles whenever you are in the canyon, without any exceptions whatsoever. You carry everything into the canyon, and you must carry absolutely everything back out to the rim with you. This includes all of your trash, any food scraps, and, yes, all human waste and toilet paper must be packed out. The inner canyon is an incredibly beautiful but fragile ecosystem that needs your utmost respect and diligent protection during your visit. You can learn more about these guidelines at the Leave No Trace Center for Outdoor Ethics website.
Safety on the Trail
The key to a safe and successful Grand Canyon day hike in winter—especially for any beginner—is this simple truth: Do not hike as deep as you think you can easily go. The true test of your expertise is not how far you manage to go down, but how safely and strongly you get yourself back up to the rim. Aim for a sensible, conservative turnaround point like Cedar Ridge, and if you feel genuinely amazing at that point, maybe push on carefully to Skeleton Point. Anything deeper than that is strictly reserved for highly experienced hikers only.
Go out there, be smart, be prepared, and enjoy one of the most incredible, humbling experiences the world has to offer you. Do you think you will tackle the Bright Angel or the South Kaibab Trail for your first descent?

Follow Cap Puckhaber on Social Media

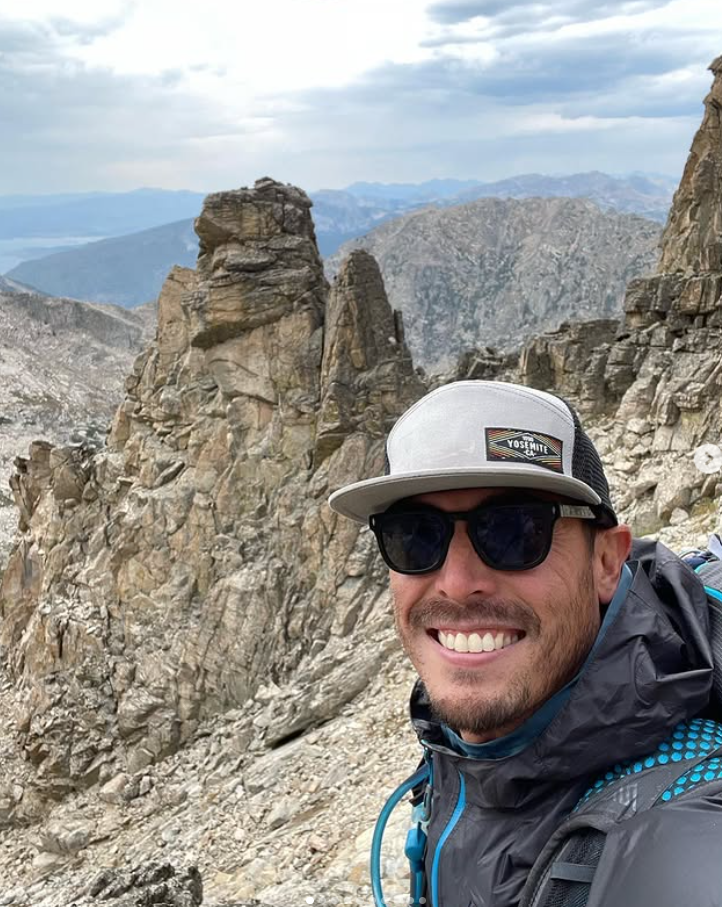
Cap Puckhaber
Backpacker, Marketer, Investor, Blogger, Husband, Dog-Dad, Golfer, Snowboarder
Cap Puckhaber is a marketing strategist, finance writer, and outdoor enthusiast from Reno, Nevada. He writes across CapPuckhaber.com, TheHikingAdventures.com, SimpleFinanceBlog.com, and BlackDiamondMarketingSolutions.com.
Follow him for honest, real-world advice backed by 20+ years of experience.