
How to Hike Longer and Farther: Building Stamina and Mastering Trail Time
By Cap Puckhaber, Reno, Nevada
When I first started seriously hitting the trails outside of Reno, Nevada, I quickly realized two things. First, my lungs and legs had a lot of catching up to do. Second, I had no reliable way to gauge how long a hike would actually take. You might think that a 15-mile trail is a simple calculation of distance over time, but the mountains simply don’t work that way. I’ve been caught out at dusk more than once because I relied on a flat-ground pace when I should have been factoring in thousands of feet of elevation gain. It was a stressful way to end a day that was supposed to be enjoyable. This hiking guide is proven to help you hike longer and farther.
This post is my detailed look into the two sides of conquering any trail. We’ll cover building the stamina to push past your previous limits. We will also cover using smart strategies like the Naismith Rule to accurately predict your time so you’re never caught off guard. We’ll combine my own tried-and-true training regimen with the time-tested math that experienced hikers use to plan their routes. Whether you’re aiming for a daunting 30-mile day or simply want to finish that local 10-mile loop feeling strong, you’ll get the honest, actionable advice I’ve gathered from years on the trail. You’re going to learn how to hike longer, farther, and smarter.
Building Your Engine: The Foundation of Hiking Endurance
Hiking is an exhilarating way to explore the outdoors. To truly enjoy those longer and more challenging trails, you need to build up serious hiking endurance. Developing the stamina for feats like a 10-mile trek or a 30-mile hike in a single day takes time, effort, and a well-planned approach. As Cap Puckhaber, I’ve seen firsthand how consistency pays off big time. Here are the tried-and-tested tips that help me conquer those rugged paths with confidence.
Start with Hiking Endurance-Specific Training
The key to hiking longer distances is building the right kind of endurance. My approach to hiking endurance training focuses on gradually increasing your ability to sustain a steady pace over extended periods. You absolutely should begin with shorter hikes. Increase the distance only as you grow stronger. Consistency is key, so I make it a habit to hike several times a week to allow my body to adapt to longer trips. I’m telling you, even a two-mile walk after work adds up over a month.
Don’t Just Hike, Cross-Train
But don’t just rely on your outdoor sessions. I always make sure to complement my outdoor adventures with additional endurance training. You should aim for a variety of activities that mimic the specific endurance challenges of hiking. Activities like cycling, swimming, and rowing can all help you build cardiovascular fitness. This is vital for those long, high-mileage days when you’re maintaining an elevated heart rate for hours. I remember one summer when I focused heavily on cycling. When I got back on the trail, my recovery time on steep ascents was dramatically shorter. The cross-training effect is huge, and it also helps prevent the overuse injuries that come from doing the exact same movement day in and day out. Don’t fall into the trap of thinking a hiker only needs to hike.
Effective Cardio Workouts for Busy Schedules
If your schedule is packed and you can’t always get outside for a long hike, cardio workouts can still be a great way to boost your stamina. I’m a marketing professional and part-time blogger, so fitting in exercise is a constant juggle. I try to fit in short yet effective cardio sessions that keep my heart rate elevated, mimicking the strain of a hike. High-Intensity Interval Training ($\text{HIIT}$) is an excellent option for busy people. You can do a quick $\text{HIIT}$ workout in as little as 20-30 minutes. You can incorporate exercises like mountain climbers, jump squats, or cycling on a stationary bike.
The Goal of Cardio
The primary goal is to get your body used to maintaining an elevated heart rate for extended periods. This is incredibly crucial for those longer hikes. When you’re constantly climbing, your heart is working overtime, and you want to prepare it for that workload. You can even incorporate weight training into your cardio routine. This helps build muscle endurance, especially in your legs and core. These muscle groups are absolutely essential for maintaining good form and avoiding unnecessary fatigue on long hikes. Think about how many times you have to stabilize yourself over a rock or root. That requires core strength, not just leg power.
Cardio Without High-Impact Running
While running is a popular way to improve cardiovascular fitness, I’ll tell you right now it’s not the only option. It also isn’t always the best one for hikers. Hiking often involves varying terrains, steep climbs, and extended periods of walking. Training without running is not only possible but also highly practical. For those who prefer low-impact exercises, power walking is a great alternative. Walking on an incline or using a treadmill with an incline setting can perfectly simulate the effort of hiking uphill without the impact stress of running on your joints. This is especially important for folks who are carrying a little extra weight or who are dealing with older knees.
Use the Stairs
Stair climbing is another phenomenal cardio workout to build leg strength and endurance. If you don’t have access to a stairwell, consider using a stair climber machine at the gym. You could also find a set of stairs in your local area. This particular form of cardio strengthens your quads, hamstrings, and calves. This makes your uphill climbs during a hike much more manageable. I’ve found that ten minutes on a stair climber is worth two miles of flat walking. It’s fantastic when it comes to conditioning the specific muscles you use for ascending. As the experts at REI often point out, targeted resistance training like squats and lunges will fortify your muscles and connective tissue, significantly improving your movement efficiency on the trail.
Preparing for Long Hike Training Days
If you’re gearing up for an ambitious goal like completing a 30-mile hike in a single day, or even a multi-day backpacking trip, proper training is non-negotiable. I recommend you start by scheduling longer training hikes in the months leading up to your big adventure. Gradually build up to longer hikes, but be sure to listen to your body’s signals. Aim for one long hike every few weeks. Progressively work up to your goal distance. I can’t stress this enough. Don’t try to jump straight to a 30-mile day without the proper training. It’s absolutely crucial to build stamina and mental toughness progressively. Your body needs time to adapt, and so do your feet.
Pay Attention to Your Gear
While preparing for these long hikes, you must pay close attention to your gear, hydration, and nutrition. A 30-mile hike can easily take eight to twelve hours or more. Fueling your body throughout the day is critical. Carry enough water, pack high-energy snacks like nuts and dried fruit, and bring a light lunch to keep your energy up. You should absolutely practice packing light but smart by taking only the essentials. You’ll want to keep your pack weight manageable without sacrificing comfort or safety. I learned the hard way that an extra pound of unnecessary gear feels like five by mile twenty.
Rest, Recovery, and Injury Prevention
It’s easy to get caught up in the grind of training. Rest and recovery are just as important as the workouts themselves. Overtraining can quickly lead to burnout or serious injuries. Make sure to include dedicated rest days in your schedule. Stretching, foam rolling, and getting enough quality sleep are all vital. They allow your muscles to recover fully. This practice keeps you feeling fresh and prepared for your next tough training session or actual hike. If your legs are constantly sore, you aren’t adapting. You’re just wearing down.
I’ve had moments where I felt I needed to push through a sore hamstring. I only found myself sidelined for a week because of it. Learning when to take an extra rest day is a sign of expertise, not weakness. In fact, many successful training plans, including those laid out by groups like the Washington Trails Association, emphasize the importance of strength training and mobility work to keep you injury-free, alongside the cardio. This helps build the stabilizing muscles around your joints, especially the ankles and hips, which take a beating on uneven trails.
The Science of Speed: Predicting Your Hike Duration

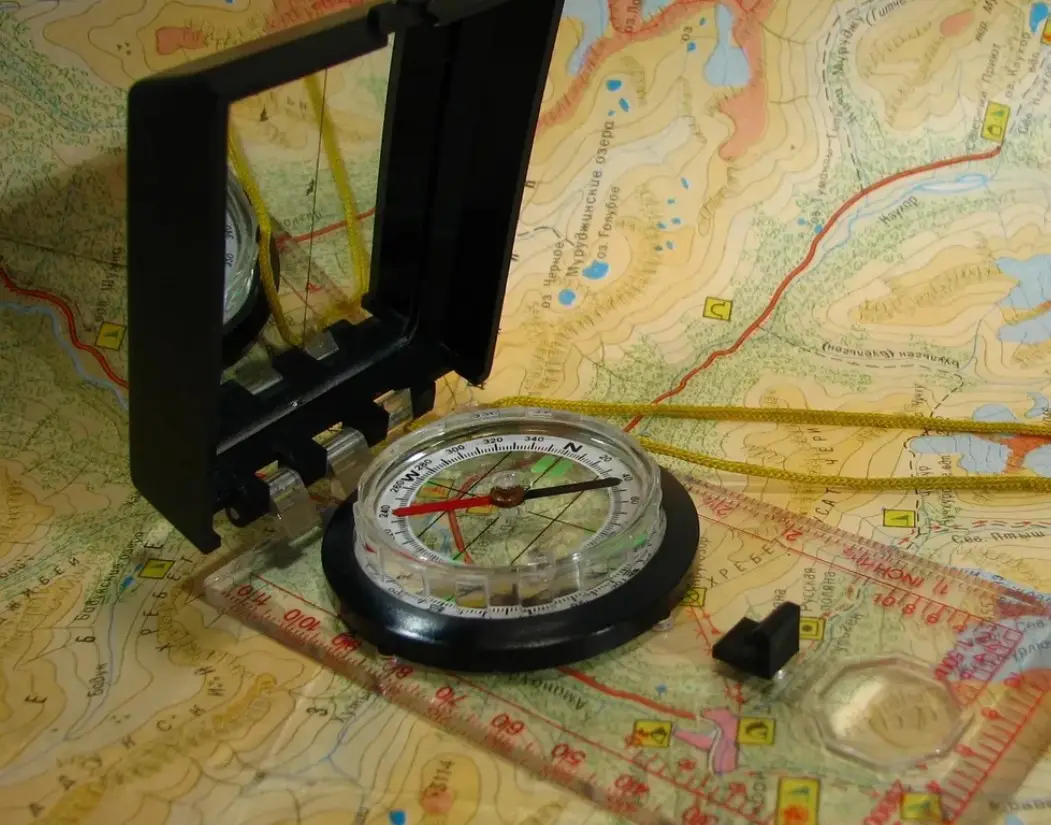
Once you have the fitness to go the distance, the next challenge is accurately predicting how long it will take. This is a crucial piece of trail planning. When I first laced up my hiking boots for some serious trail time, I quickly learned something. Estimating how long a hike will take is more of an art than a science. You might think, “It’s 15 miles, so it should take X hours,” but the reality is way messier, especially in the mountains. That’s where the Naismith Rule comes into play. It’s like the old-school cheat code for hikers trying to figure out how long a trek will take. Over the years, I’ve leaned on it more than once. Sometimes it’s spot on, and sometimes it makes me scratch my head.
Understanding the Naismith Rule Baseline
Let me break down what this rule is, how to calculate it, and all the little curveballs you need to factor in. These include uphill climbs, backpack weight, and even the downhill stretches that sometimes feel like they take forever. If you’ve ever wondered how long it really takes to climb 1,000 or 2,000 feet, or how a 15-mile hike fits into your weekend, this rule is your starting point.
Back in 1892, a Scottish mountaineer named William Naismith came up with a simple formula to estimate hiking time. His original rule says to allow 1 hour for every 3 miles (5 km) walked. You also add 1 hour for every 2,000 feet (600 meters) of ascent. That’s it. No fancy tech or $\text{GPS}$ required. It’s just a rule of thumb to get you in the ballpark.
The Naismith Formula
Here’s the formula in plain English that I use. You walk 3 miles, which equals 1 hour. You climb 2,000 feet, which equals 1 hour. So if you’re planning a hike that’s 9 miles long with 2,000 feet of elevation gain, you’d expect roughly 4 hours. That’s 3 hours for the 9 miles of distance, plus 1 hour for the climb. This simple approach was revolutionary for its time. Honestly, it still holds up pretty well as a baseline estimate. The American Hiking Society and many trail guides still reference this rule when planning hikes because of its sheer simplicity.
Calculating Hiking Time with Practical Examples
Here’s how I actually apply this when planning a hike. Say you have a 15-mile trail with 3,000 feet of elevation gain. You start with the flat distance. 15 miles divided by 3 miles per hour equals 5 hours. Then you add time for elevation. 3,000 feet divided by 2,000 feet per hour equals 1.5 hours. Your total estimated hiking time equals 5 hours plus 1.5 hours, for a total of 6.5 hours.
Simple math gives you a starting point. I usually add a little buffer depending on conditions. You always need to think about breaks, slower pace on rough sections, or terrain quirks. When I helped a client plan a long day hike for their company outing, we used Naismith’s Rule as our baseline. It helped set realistic expectations for the whole group. This was especially true since some hikers were new to steep climbs.
Terrain Always Wins
But honestly, 15 miles can feel very different depending on the terrain. A 15-mile hike on rolling hills is not the same as 15 miles through rocky, rugged mountain terrain. On trails where I’ve carried a heavier pack or dealt with loose scree, my pace has dropped significantly. It’s also worth mentioning that as the day goes on, fatigue sets in. Your pace might slow. The rule doesn’t account for fatigue or breaks, so you must keep that in mind. For longer, more ambitious hikes, I always factor in extra time.
The Limitations and Adjustments to Naismith’s Rule
Naismith’s Rule is a rough guide, not gospel. It’s most accurate for moderate terrain, average fitness levels, and light to moderate backpack weight. It gets fuzzy fast when you add tougher conditions. These include loose rocks, thick brush, or muddy slopes. It also gets fuzzy if you’re moving extremely fast, like a trail runner. It also doesn’t consider the pace of a beginner hiker.
I remember a challenging hike in the White Mountains where Naismith’s estimate was way off. The trail was incredibly steep and rocky. The extra caution slowed our group dramatically. The formula didn’t account for scrambling sections or the need for multiple rest breaks. It’s still useful as a baseline, especially when you have limited information. You just need to add your own seasoning. For instance, the Ordnance Survey has worked to refine the rule. They recognize that a single pace for every hiker is simply unrealistic, which backs up my skepticism about any one-size-fits-all formula.
Beyond Naismith: Tranter’s Correction and Other Adjustments
Because Naismith’s Rule is so basic, other hikers have built upon it. The most well-known is probably Tranter’s Correction. This adjustment attempts to factor in your personal fitness level and the fatigue that builds up on a long day. It’s a bit more complex. It works by calculating your “fitness” based on how long it takes you to climb a certain elevation over a set distance. You then use that number to adjust the time Naismith’s Rule gives you.
Honestly, it gets complicated fast, and there are others too, like the Langmuir extension. I prefer a practical approach. I know my own body and I know that after about six hours, my pace will slow down, regardless of what a formula says. This is why I add a personal buffer. My “Cap’s Correction” is just adding 15 minutes for every 3 hours of hiking, and 30 minutes if I have a heavy pack. It’s not scientific, but it’s based on experience.
Accounting for Downhill Speed and Technical Descent
Naismith’s Rule adds time for uphill climbs but says nothing about downhill pace. That’s a big deal. Descending can be just as slow or even slower, especially on steep, technical trails. I’ve learned the hard way that downhill pace varies wildly. It depends on terrain and how heavy your pack is. Loose rocks, exposed roots, and steep drops can slow you to a crawl. On one trip in the Rockies, descending a steep, rocky ridge took almost as long as the ascent. This is something the basic Naismith’s Rule doesn’t cover at all.
Some hikers use additional rules for downhill speed, but I prefer a practical approach. I usually add 10 to 15% more time to my total estimate if the descent is rough or technical. For a gentle, smooth downhill trail, I don’t add extra time. I might even subtract a little if I’m feeling spry and my pack is light. You should always use good judgment here.
The Real-World Impact of Backpack Weight
Here’s where things get personal. The weight you carry makes an immense difference in how fast you move and how quickly you fatigue. Heavier packs increase fatigue and slow your pace, especially on climbs. Naismith’s Rule doesn’t explicitly include pack weight, but it’s the number one factor I always consider when applying the rule. Many beginners make the mistake of overpacking, and it costs them dearly in both speed and enjoyment.
A great rule of thumb, which publications like Backpacker magazine explain, is to keep your pack weight reasonable for your body. For a day hike, your pack should not weigh more than about 10 percent of your body weight. For a multi-day backpacking trip, you should aim for no more than 20 percent. So, if you weigh 150 pounds, your day pack should be 15 pounds or less, and your big backpacking pack should be 30 pounds or less. This includes your food, water, and fuel.
Determining the “Right” Pack Weight for Speed
This 10-20% guideline is a fantastic starting point. Experienced hikers talk about “base weight,” which is the weight of all your gear before you add consumables like food and water. For a day hike, keeping your pack under 20 to 25 pounds usually keeps you moving efficiently. For multi-day hikes, 30 to 40 pounds is more common but does slow you down. If your goal is to maintain a steady pace, aim for a base weight that lets you stay within that 20% total pack weight goal.
Your “right” weight depends entirely on your personal fitness, experience, and specific goals. Some dedicated ultralight hikers carry a base weight of less than 15 pounds and move at incredible speed. Others prefer heavier packs with more comfort gear and accept a slower pace. When I worked with a backpacking coach, they emphasized that reducing weight even by five pounds can save minutes on every mile. That definitely adds up over a long trail like the Pacific Crest Trail.
How Long Does it Actually Take to Climb 1,000 Feet?
Going back to Naismith’s Rule, climbing 2,000 feet adds roughly one hour to your hike time. Therefore, climbing 1,000 feet would add about 30 minutes. In reality, the time it takes to climb depends completely on your fitness level, the trail steepness, and the load you’re carrying. I remember a particularly steep section of the Appalachian Trail in New Hampshire. It took me closer to 90 minutes to gain 2,000 feet because the terrain was so rough. I also had to stop for multiple breathers.
For a typical hiker on moderate, well-maintained terrain, you can expect 1,000 feet of gain to add approximately 30 minutes to your time. 2,000 feet of gain will add approximately 60 minutes. If you’re carrying a heavier pack or dealing with technical trail sections, you absolutely must add extra time accordingly.
Actionable Strategies to Go Longer and Farther
Knowing the math is one thing. Making your body capable of consistently meeting those projections requires discipline. These aren’t just tips. They’re the strategies that allow me to hike all over the Sierra Nevada mountains with confidence.
The Power of Low-Intensity, Long-Duration Training
Most busy people tend to look for quick workouts that they can squeeze into their schedule. That means short, intense training sessions. However, the best way to train for hiking endurance is to perform low-intensity exercise for longer time frames. When it comes to hiking, I recommend doing day hikes where you are deliberately out for several hours. You need to get used to the simple feeling of being on your feet for a long time.
This is often called Low-Intensity Steady-State (LISS) training. As Outside Magazine points out, hiking itself is a superb way to build endurance and strength. The research even suggests that a moderately paced hike in nature feels less fatiguing than doing the same level of work indoors. You must hike at a comfortable pace that you can sustain for an entire day. Avoid energetic spurts followed by long breaks. Your goal is to be continuously active for a set amount of time or distance, not speed. This kind of steady-state aerobic activity builds the muscular and cardiovascular adaptations needed to process oxygen efficiently and resist fatigue.
The Role of Strength Training in Endurance
While cardio is critical, strength is truly King for hikers. A strong base in the major muscle groups is essential. I focus my gym time on strengthening the legs, core, and glutes. These muscles are what support the load of your pack. They also help stabilize your body on uneven ground.
I incorporate exercises like squats, lunges, and step-ups into my routine. For example, I’ll often do step-ups holding a 15-pound dumbbell in each hand. This simulates the strain of stepping up onto a high rock with a pack on my back. A great exercise I’ve found is doing walking lunges on a slight incline. The combination of the slight hill and the lunges is very similar to the demands of steep uphill hiking. You can easily make it harder by wearing a lightly loaded pack. Strengthening your core, through exercises like planks and hip bridges, also prevents lower back strain. This is a common complaint on longer trips with a heavier load.
A Smart Fueling Strategy for Long Days
A lot of hikers underestimate the science of fueling. For a long day, you need to refuel with the right food. Your body burns carbohydrates, fats, and proteins when you exercise. You need to replenish all three. I like to eat complex carbohydrates the night before, like a good pasta dish or quinoa. During the hike, I rely on a mix of simple sugars like dried fruit or a sports gel for immediate energy. I also eat fats and proteins like nuts or a protein bar for sustained energy. I always pack a real lunch, like a wrap or a sandwich, to eat midday.
Why Hydration is More Than Just Water
Hydration is arguably more important than food. With sufficient water and electrolytes, your body can run smoothly. It can also recover from activity much more effectively than if you were dehydrated. When you sweat, you not only lose water but also essential salt and minerals like sodium and potassium. These must also be replenished. That’s why I always bring an electrolyte mix or salt tablets, especially on summer trips in the dry heat of Nevada. Never wait until you feel thirsty to start drinking. That means you’re already behind. I make it a rule to take a few sips of water every 15-20 minutes, no matter what.
Using Trekking Poles for Efficiency and Safety
Some people frown upon trekking poles. They believe poles are only for older people or those with knee problems. That’s a mistake. Using trekking poles makes you a much more efficient hiker, period. Walking for long distances inevitably strains the lower body, especially the knees and hips. By using poles, you effectively transfer some of the burden into your upper body. You put weight into your arms and shoulders.
Poles are especially beneficial on descents. They absorb shock and provide two extra points of stability. This greatly reduces strain on your joints. Authoritative sources like REI’s expert advice page confirm that poles can reduce force on your knees during downhill hiking. This can save you a world of hurt over a 15-mile day. I started using them years ago. They’ve completely changed my downhill pace and my post-hike recovery. I won’t head out on anything longer than five miles without them.
Don’t Fall for the Fast-Start Trap
I am seriously guilty of this one. When one is feeling fresh, energetic, and excited at the trailhead, it is so easy to start too quickly. We’ve all done it. Instead, you need to try the opposite approach. Start slowly to warm up. Then settle into your regular, sustainable pace. Most people hike between two and three miles per hour. Your goal should be to finish the day at the same pace you were keeping an hour in.
Starting and stopping repeatedly is not an efficient way to hike. It’s also not the best way to build true endurance. When you rest, your muscles cool down, and your heart rate drops. This makes it much harder to restart your momentum. A slow, steady rhythm minimizes the impact on your joints. It also conserves energy reserves. This ultimately allows you to cover more distance with less overall fatigue.
Bringing It All Together: The Comprehensive Trail Plan
I use Naismith’s Rule as my personal $\text{GPS}$ before I even touch the technology on my phone. It helps me visualize the day, plan rest breaks, and make sure I’ve packed enough snacks and water. When planning a big hike, I always follow this simple flow. It ensures I combine both the endurance training principles and the time estimation accuracy. This holistic approach prevents me from getting into trouble late in the day when the sun is setting and my energy is flagging.
Step 1: Calculate the Naismith Baseline
You absolutely must use the 3 miles per hour and 2,000 feet per hour rule. This will get you the bare minimum time required for your hike. This gives you the basic mathematical framework for the day. You should never skip this step. It forces you to face the reality of the elevation gain, which is usually the most underestimated factor on any mountain route.
Step 2: Apply Your Personal Adjustment Factor
If I’m carrying my standard 25-pound day pack, I add 10 to 15 minutes of buffer time for every three hours of calculated hiking. If I have a heavy 40-pound overnight pack, I’ll add a more generous 30 minutes per three hours. I know that weight will slow me down and demand more rest time. This step customizes the time to my own body and my specific gear load.
Step 3: Factor in Terrain and Descent
If I know a section is particularly rocky or the descent is steep and technical, I add another 10 to 15% to that specific segment’s calculated time. For example, if the last two miles are a steep downhill with loose scree, I’ll allow an extra 20 minutes for that section alone. A downhill on bad footing can be incredibly slow and dangerous if rushed. This ensures safety is factored into the time, not just speed.
When planning hikes these days, I also use apps like AllTrails or $\text{Gaia GPS}$ to get precise distance and elevation data. These tools help me refine Naismith’s baseline and adjust for terrain difficulty. They provide digital verification for my manual calculations. The truth is, the rule is a great starting point. Nothing beats actual field experience and honestly tracking your own pace. Over time, you get a feel for your own rhythm, how weight slows you down, and how terrain changes everything.
For anyone gearing up for a big hike, I’d say start with Naismith’s Rule. Then add your own seasoning. Factor in your pack weight, the roughness of the terrain, and your current fitness. And always, always give yourself a little extra time. It’s much better to finish feeling a bit early and strong than exhausted, dehydrated, or unsafe because you miscalculated your end time. Remember, hiking is part calculation, part rhythm, and a whole lot of joy in the journey.
Common Questions About Distance and Time
How Can I Speed Up My Hiking Pace Without Running?
The best way to speed up your hiking pace without resorting to running is to focus on three key areas. First, you need to work on pack weight reduction. Trimming those unnecessary gadgets or that extra water bottle you don’t need can save you minutes per mile. Second, focus on consistent core and leg strength training. This builds the explosive power that lets you clear obstacles and maintain momentum without overworking your cardiovascular system. Finally, you should absolutely start using trekking poles. They help you engage your upper body and propel yourself forward efficiently, especially on rolling terrain.
What’s a Realistic Hiking Pace for an Average Hiker?
A realistic hiking pace for an average, fit hiker on moderate, relatively flat terrain is generally around 2.5 to 3 miles per hour. However, that pace drops significantly once you factor in elevation. This is where people make big mistakes. When applying Naismith’s rule, remember that the “three miles per hour” baseline only applies to the horizontal distance. The total time will always be longer than simple math suggests. Once you add the time needed for every 2,000 feet of climb, your average overall speed for the entire hike will drop to something closer to 1.5 or 2 miles per hour.
How Does Altitude Affect Hiking Endurance and Pace?
Altitude is a major pacing killer that no simple formula fully accounts for. It’s a difficult factor to predict. For every 1,000 feet you gain above 8,000 feet, you should expect your pace to slow down. Your required rest breaks will also increase dramatically. Your body is working with about 3% less oxygen for every 1,000 feet you gain. When I’ve hiked in the high Sierra Nevada mountains outside of Reno, where trails routinely go over 10,000 feet, I cut my Naismith’s Rule pace down to almost 2 miles per hour on the flat sections. This is true even if I feel great. Your body simply can’t process oxygen as efficiently. This means your muscles fatigue faster and your recovery time is longer. You also need to drink significantly more water at altitude to stay hydrated.
Is It Better to Hike Shorter Miles Fast or Longer Miles Slow?
This is a classic debate. My answer is usually the latter, which is longer miles slow and steady. If your goal is to cover serious distance, like a multi-day trip, maintaining a slightly slower, very sustainable pace is far more efficient. It’s much better than pushing a fast pace and then having to take long, frequent breaks. Every time you stop, your muscles cool down, and your heart rate drops. This makes it much harder to restart your momentum. A slow, steady rhythm minimizes the impact on your joints and conserves energy reserves. It ultimately allows you to cover more distance with less overall fatigue over the course of a long day.
What’s the Biggest Mistake People Make When Estimating Time?
The biggest mistake people make, without question,
is failing to account for the impact of cumulative elevation gain. They’ll use a standard, flat-ground walking pace, say 3 miles per hour. They forget to add the extra time for the ascent, as if the uphill climb requires no extra effort. The distance might be 10 miles, which suggests 3 hours and 20 minutes of movement time. But if that 10 miles includes a 4,000-foot climb, you need to add an extra 2 hours for the elevation alone. Suddenly, your trip is over 5 hours. That’s not including breaks, which is a classic error that leads to hikers being caught out after dark. Always, always start your time estimate with Naismith’s Rule, and then add your personal adjustments.
About the author
Cap Puckhaber is a marketing strategist, finance writer, and outdoor enthusiast. He writes across CapPuckhaber.com, TheHikingAdventures.com, SimpleFinanceBlog.com, and BlackDiamondMarketingSolutions.com. Follow him for honest, real-world advice backed by 20+ years of experience.
A Beginner’s Guide to Backpacking
What is Rucking and Is It Good For You
6 Ways to Make It Your Best Year of Hiking

Join our Mailing List
Sign up with us now and be the first one to know about our exclusive offers and product updates.
By submitting your information, you`re giving us permission to email you. You may unsubscribe at any time.


Follow Cap Puckhaber on Social Media


About the Author: Cap Puckhaber
Backpacker, Marketer, Investor, Blogger, Husband, Dog-Dad, Golfer, Snowboarder
Cap Puckhaber is a marketing strategist, finance writer, and outdoor enthusiast from Reno, Nevada. He writes across CapPuckhaber.com, TheHikingAdventures.com, SimpleFinanceBlog.com, and BlackDiamondMarketingSolutions.com.
Follow him for honest, real-world advice backed by 20+ years of experience.