

My Complete Hiker’s Guide to Yosemite: From Permits to Parking
By Cap Puckhaber, Reno, Nevada
I’m Cap Puckhaber, a marketing pro by day and an outdoor enthusiast pretty much every other second I get. I’ve spent years on the trail, and I can tell you honestly that few places hit you as hard as Yosemite. My first time driving into the valley, I came through the Wawona Tunnel and pulled over at Tunnel View. It was pure magic. You see the photos, but nothing prepares you for the scale of El Capitan or the way Half Dome just dominates the skyline. It’s one of those “oh, wow” moments that just sticks with you. I’ve been back many times since, and I’ve learned a lot, mostly by making mistakes. This park is one of the most iconic hiking destinations in the United States, but it’s not a place you can just show up to and expect to have a good time. Planning is everything.
I wanted to put all my knowledge into one place. This isn’t your standard tourist brochure. This is my complete breakdown of how to actually do Yosemite. We’re going to cover the confusing permit systems, the parking nightmare, the best times to go, my favorite itineraries, and the essential tips I’ve picked up along the way.
A Quick Look at Yosemite’s Giants
Before we get into the logistics, let’s just take a second to appreciate what we’re here to see. The history of this place is as massive as the granite. This land was home to the Ahwahneechee people for centuries before settlers arrived. In 1864, President Abraham Lincoln actually signed a bill granting Yosemite Valley and the Mariposa Grove to California as a public park. This was a groundbreaking idea, setting the stage for the national park system as we know it. The park was officially established in 1890, thanks to the tireless work of people like John Muir. It’s a special place, and you feel that history when you’re walking the trails.
El Capitan: The Granite Monolith
You can’t miss El Capitan. It’s this absolute giant of a granite monolith that rises 3,000 feet straight up from the valley floor. It’s famous in the climbing world; you might have seen documentaries about people spending days scaling its sheer face. For hikers, the best way to experience it is from the Yosemite Valley Loop Trail or from El Capitan Meadow. I love grabbing a snack, sitting in the meadow, and just watching the climbers (they look like tiny ants) through binoculars. It really puts the scale of the park into perspective.
Half Dome: The Icon
Half Dome is the park’s most recognized peak, hands down. It has that distinct, sheared-off shape that looks impossible. Hiking to the top is a bucket-list experience for a lot of people, but I need to be clear: it is a strenuous and serious all-day hike. The most famous part is the final 400-foot ascent up the cables. It’s not for the faint of heart, and it absolutely requires a permit, which we’ll talk about in detail later. Even if you don’t hike it, seeing it catch the sunset light from the valley is an experience in itself.
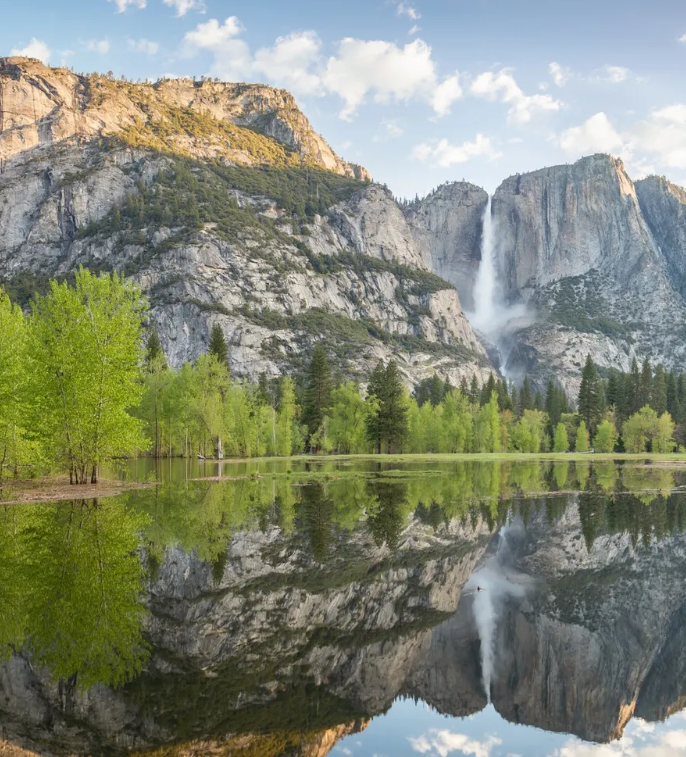
Yosemite Falls: The Tallest in North America
Plunging a total of 2,425 feet in three sections, Yosemite Falls is a monster. It’s the tallest waterfall in North America and its roar in the spring is something you can feel in your chest. The best time to see it is definitely in May or June when the snowmelt is at its peak. By late summer, it can slow to a trickle. There’s an easy, one-mile loop trail to the base (Lower Yosemite Fall) that’s great for everyone. The hike to the top (Upper Yosemite Fall) is a serious workout, but the views are worth every step.
Mariposa Grove: The Ancient Giants
You have to see the giant sequoias. The Mariposa Grove, near the park’s South Entrance, is home to hundreds of these ancient trees, including the famous Grizzly Giant. Walking among trees that are thousands of years old is a humbling experience. It makes you feel incredibly small in the best way possible. There are several trails through the grove, from easy walks to more moderate hikes. It’s a perfect first-day or last-day stop to ground yourself.
Glacier Point: The Ultimate View
If you want that one postcard view that captures everything, go to Glacier Point. It offers a spectacular, jaw-dropping panorama of Yosemite Valley, Half Dome, Yosemite Falls, and the High Sierra peaks. You can drive right up to it during the summer. I love starting my day here for a sunrise view. Seeing the first light hit Half Dome is unforgettable. It’s also the starting point for some incredible hikes, like the Four-Mile Trail (which is actually closer to 4.8 miles) down to the valley.
Getting to and Around Yosemite
Okay, logistics time. Planning how you’ll get to and enter the park is the first hurdle. Your experience will be a lot smoother if you figure this out months in advance.
How to Actually Get to Yosemite
Most people get here by car. The park is accessible via several routes, but the best one depends on where you’re coming from and the time of year. The Big Oak Flat Entrance (via Highway 120) is the most direct route from the San Francisco Bay Area. The South Entrance (via Highway 41) is the most popular for visitors coming from Los Angeles or San Diego, and it’s right by the Mariposa Grove.
If you’re flying, the closest major airport is Fresno Yosemite International Airport (FAT), which is about a 2-hour drive from the South Entrance. You can also fly into San Francisco (SFO) or Sacramento (SMF), but expect a 4 to 5-hour drive from there. One great option is the YARTS (Yosemite Area Regional Transportation System) bus, which runs from gateway towns and even Fresno, helping you avoid the park’s parking and driving headaches entirely.
Understanding the Main Entry Points
Yosemite has five main entrances, but not all are open year-round. The three western entrances—Big Oak Flat, Arch Rock (Highway 140), and the South Entrance—are typically open all year, though chains may be required in winter.
The most famous entrance, Tioga Pass (Highway 120 East), is the only one on the east side of the Sierra. This pass is seasonal and a huge factor in planning. It usually opens in late May or June and closes after the first significant snowfall, often in October or November. This road is your access to the high country, including Tuolumne Meadows. Always check the official Yosemite National Park website for current road conditions before you even leave your house.
The Reservation System You MUST Understand
This is, without a doubt, the most important part of your planning. In recent years, Yosemite has implemented a vehicle reservation system during the peak season (roughly April through October) to manage congestion. This means you can’t just drive into the park on a whim. You need to book an entry reservation on Recreation.gov, and they sell out fast.
This system has changed almost every year, so I’m not going to give you specific dates. What I am telling you is that you must go to the NPS website and check the current year’s rules. If a reservation is required, you’ll also need to pay the $35 per-car entrance fee, which is then valid for three to seven days. Don’t be the person who drives four hours only to be turned away at the gate.
When to Go? Timing Your Yosemite Visit
The “best time” to hike in Yosemite really depends on what you want to see, as the park changes dramatically with the seasons.
My Favorite Season: Chasing Waterfalls in Spring
I think late spring (May to early June) is the absolute best time. The reason is simple: the waterfalls. The snowmelt is raging, and Yosemite Falls, Bridalveil Fall, and the Mist Trail falls (Vernal and Nevada) are at their most powerful. The weather is usually mild, and the high country roads like Tioga Pass are often just opening up. The dogwood trees are blooming in the valley, and everything feels alive. It’s just a spectacular time to be there.
Summer: The Peak Season Pros and Cons
Summer (June through August) is the busiest time, bar none. This is when schools are out, and the park is packed. The weather is warm and stable, and all park roads and trails, including those in the high country, are accessible. This is the best time for backpacking and tackling high-elevation peaks. However, you have to be prepared for crowds. Trails will be busy, parking will be a nightmare, and you’ll need reservations for everything. If you hike in summer, you must start your day before sunrise.
Fall and Winter: The Quiet Seasons
Fall (September and October) is a fantastic time to visit. The crowds thin out dramatically after Labor Day, the weather is cooler, and there’s a lovely, calm feeling in the air. The waterfalls will be at a trickle or completely dry, but the hiking is still world-class. Tioga Pass is usually open until the first big snow.
Winter is a completely different kind of magic. It’s perfect for those who enjoy solitude. Many trails are closed by snow, but the valley is often accessible and incredibly beautiful when dusted in white. It’s a great time for snowshoeing or just enjoying the quiet. Just be aware that Tioga Pass and Glacier Point Road will be closed.
The Parking Nightmare (And How to Beat It)
I’m dedicating a whole section to this because parking in Yosemite Valley, especially during the busy months, can ruin your day if you’re not prepared. I’m not exaggerating. I once spent 90 minutes circling lots just to find a spot to hike the Mist Trail.
Why Parking is Such a Headache
Yosemite Valley is the main hub for most visitors. It’s where you’ll find the major trailheads for Yosemite Falls, the Mist Trail, and Mirror Lake. There are several large lots, but they just can’t handle the volume of cars from about 9 AM to 4 PM. People park illegally along the roads, creating gridlock. It’s a total mess.
My Strategy for Parking in Yosemite Valley
Here is my advice: arrive before 8 AM. I am being completely serious. If you are not parked and walking to your trailhead by 8:30 AM at the latest, you’ve already lost the battle. My go-to lots are the large day-use lot near Yosemite Village or the lot at Curry Village (now Half Dome Village). If you’re hiking the Mist Trail, the Curry Village lot is a good bet, though it’s still a bit of a walk. If those are full, your only option is to keep circling and hope, or give up and use the shuttle.
Using the Shuttle System: A Lifesaver
Honestly, the best strategy is to park your car once and not touch it again. The free Yosemite Valley shuttle system is fantastic. It operates throughout the park, hitting all the major trailheads, viewpoints, and visitor centers. If you’re staying in the Valley, just leave your car at your lodge or campsite. If you’re a day-tripper, drive in, find the first available spot you can (even if it’s at the far end of the valley), and then use the shuttle to get around. It’s free, it runs frequently, and it saves you an incredible amount of stress.
Where to Stay: Camping and Lodging
Yosemite offers a range of camping options, from fully developed campgrounds to deep backcountry sites. For car camping, the campgrounds in Yosemite Valley like North Pines and Upper Pines are the most convenient base for exploring. However, they are also the most popular.
Securing a Campground Reservation
These campgrounds sell out instantly. Reservations are on Recreation.gov and are released in blocks, five months in advance. You have to be online with your finger on the button the second they become available. It’s as competitive as getting concert tickets. If you’re venturing into the backcountry, you’ll need a separate wilderness permit, which also acts as your camping permit. We’ll cover that next.
A Quick Note on Lodges
If camping isn’t your style, there are lodges in the park, from the historic Ahwahnee to the more rustic Curry Village tent cabins and the Yosemite Valley Lodge. These also book up months, or even a year, in advance. Planning ahead is the constant theme for a Yosemite trip.
My “Must-Do” Yosemite Hiking Itineraries
If you’re trying to figure out how to structure your time, here are a couple of itineraries I’ve used that work really well.
The “I Only Have 1 Day” Whirlwind Tour
If you have just one day, you have to be strategic.
- Morning: Get there before sunrise and go straight to Glacier Point. Watch the sun come up over Half Dome. After that, drive down to the Valley and hike the 1-mile loop to the base of Lower Yosemite Fall.
- Midday: Head to the Mariposa Grove to see the giant sequoias. A walk among these ancient trees is a must-do.
- Afternoon: Spend the rest of your time exploring the Valley floor. Grab a view of El Capitan from the meadow, check out the Ansel Adams Gallery, and take a quick, flat walk along the Merced River on the Yosemite Valley Loop Trail.
A More Relaxed 3-Day Exploration
With three days, you can really sink your teeth into the park.
- Day 1: Start with a serene morning hike to Mirror Lake for that classic reflection of Half Dome. In the afternoon, drive up to Glacier Point for the panoramic views. If you have the energy, add the short hike to Sentinel Dome from the same parking area.
- Day 2: This is your big hike day. Tackle the Mist Trail. This is my favorite hike in the park. You’ll get soaked by spray from Vernal Fall and then climb up to the top of Nevada Fall. It’s a tough, steep climb, but the payoff is incredible.
- Day 3: Explore a different part of the park. If Tioga Road is open, take a scenic drive up to the high country. Stop at Tuolumne Meadows for a beautiful, flat hike through the meadows and along the river. It feels like a totally different world from the Valley.
Understanding the Yosemite Permit System
This is where things get complicated, but it’s essential. Permits are required for certain activities, mostly to protect the wilderness from overuse. Day hikes in most of the park do not require a permit. The big exceptions are hiking to the top of Half Dome and any overnight backpacking.
The Half Dome Cable Lottery
You cannot hike to the top of Half Dome without a permit, period. The National Park Service issues these permits through a lottery system on Recreation.gov. There’s a pre-season lottery held for the entire month of March. You apply, pick your preferred dates, and hope you get lucky. A non-refundable $10 fee is required to apply.
If you win, you then pay a $10 recreation fee per person. If you strike out in the pre-season lottery, there is also a very small daily lottery that runs two days in advance. Don’t count on this. Rangers are stationed at the base of the Subdome checking every single person for a permit.
Planning a Backcountry Trip
For a more rugged experience, Yosemite’s backcountry is incredible. To camp overnight in the wilderness, you must have a wilderness permit. These permits are specific to your entry trailhead and your start date. This is how the park manages capacity and preserves the wilderness feel.
How to Apply for a Wilderness Permit
Sixty percent of wilderness permits are reservable 24 weeks (that’s about 6 months) in advance, again on Recreation.gov. Just like campgrounds, the most popular trailheads (like those heading to Clouds Rest or along the John Muir Trail) are snapped up immediately. The remaining 40% are released seven days in advance. You’ll need to know your exact itinerary, including which trailhead you’re starting from. You can find excellent trail descriptions and planning resources on sites like Backpacker.com.
Popular Backcountry Routes
Some of the most popular backpacking routes include the stunning hike to Clouds Rest, which I think has an even better view than Half Dome. The John Muir Trail (JMT) also famously starts (or ends) in Yosemite Valley. When backpacking, you must follow all wilderness regulations. This includes carrying an approved bear canister for all your food (this is not optional) and camping at least 100 feet from water.
What About Hiring a Guide?
If all this planning sounds overwhelming, or if you’re looking to tackle something big like mountaineering, hiring a guide is a great option. A guided hike can be an enriching way to learn about the park’s geology, flora, and fauna. Many outfitters provide guided day hikes, backpacking trips, and even Half Dome ascents (they handle the permits). For those with limited experience, or families wanting a more in-depth exploration, a guide can ensure your safety and really enhance the whole experience.
My Big Mistake: What Not to Do in Yosemite
I want to share a story about a mistake I made. On one of my first backpacking trips, I was hiking out of Tuolumne Meadows. I was tired at the end of the day and set up my camp right next to a beautiful, quiet lake. It was a perfect spot, maybe 30 feet from the water. In the middle of the night, I heard a ranger’s voice. They were checking permits and saw my tent. I got a stern warning (and could have gotten a hefty fine) because I violated a core rule: you must camp at least 100 feet from any water source. I knew the rule, but I was tired and lazy. It’s a good reminder: these rules exist to protect the fragile ecosystems, and they apply to everyone, no matter how tired you are. Don’t be like me.
Common Questions About Hiking in Yosemite
Let’s run through some of the most common questions I get from friends planning a trip.
- Do I really need a park entry reservation?
- It depends on the time of year! As I mentioned, the park has been using a reservation system during peak season. This changes all the time. You must check the official nps.gov website for the current year’s rules before you go.
- How hard is the Half Dome hike?
- It is extremely difficult. You’re looking at a 14-16 mile round trip with over 4,800 feet of elevation gain. The cables at the end are a physical and mental challenge. You should only attempt this if you are an experienced, fit hiker and are not afraid of heights.
- What’s the best easy hike in Yosemite?
- My top pick is the 1-mile loop to the base of Lower Yosemite Fall. It’s paved, accessible, and gives you a fantastic view. The flat, 2-mile walk to Mirror Lake is also a great, easy option with a classic view.
Key Planning and Packing Questions
- When is the best time to see the waterfalls?
- The best time is absolutely late spring. May and June are the peak flow times from the snowmelt. They are absolutely thunderous. By August, many of them are just a trickle.
- Is Yosemite always crowded?
- Yosemite Valley from May to September is very, very crowded. However, the park is huge (over 750,000 acres). You can easily find solitude by hiking just a mile or two from a trailhead, or by visiting the high country in Tuolumne Meadows or the Hetch Hetchy area.
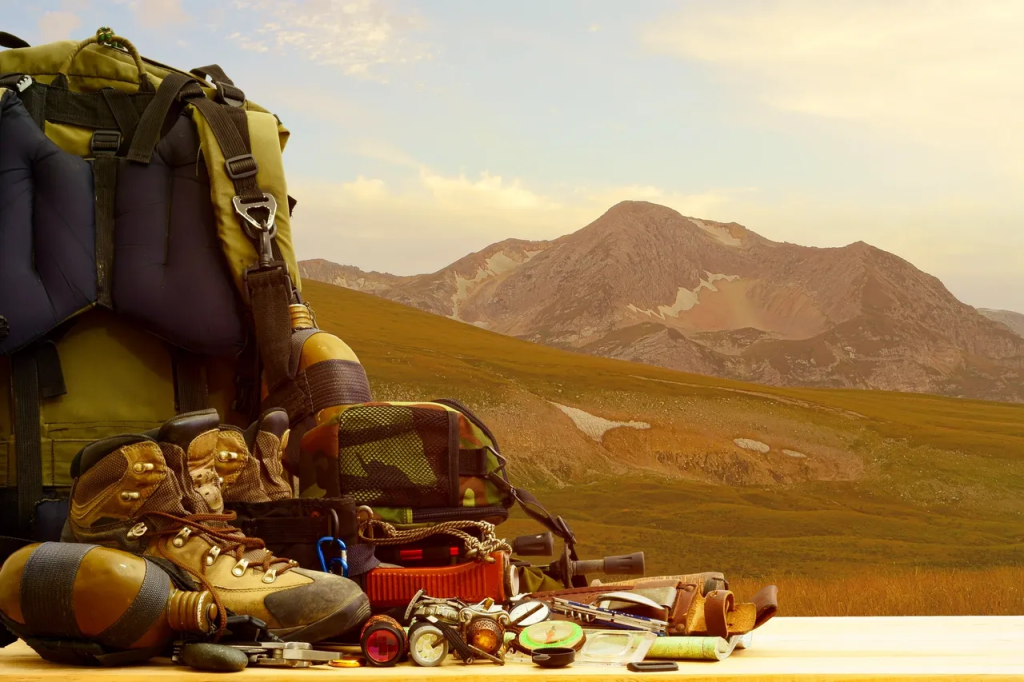
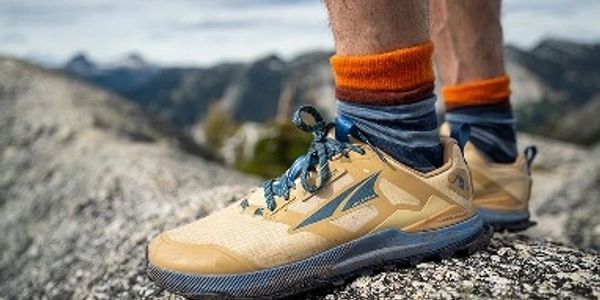
- What should I pack for a day hike?
- The “Ten Essentials” are a must. This includes navigation (like a map or an app like AllTrails), a headlamp, sun protection (sunscreen, sunglasses), a first-aid kit, a knife, and emergency shelter. Most importantly: bring more water than you think you’ll need (I carry at least 3 liters) and plenty of salty snacks. Wear broken-in hiking shoes, not new sneakers. I also always pack layers, including a rain jacket, as the weather can change fast. You can find great checklists on sites like REI.com.
Final Thoughts
Yosemite’s hiking trails offer something for everyone. It’s a place that will challenge you, inspire you, and absolutely leave you in awe. I’ve found that the key to a successful trip isn’t just seeing the big sights; it’s about respecting the park’s power and popularity. By securing the right permits, planning your parking, and choosing the right time to visit, you’ll set yourself up for an unforgettable experience.
About the author
Cap Puckhaber is a marketing strategist, finance writer, and outdoor enthusiast. He writes across CapPuckhaber.com, TheHikingAdventures.com, SimpleFinanceBlog.com, and BlackDiamondMarketingSolutions.com. Follow him for honest, real-world advice backed by 20+ years of experience.
My Ultimate Guide to California’s Best Hikes
John Muir Wilderness Guide for Beginners
Join our Mailing List
Sign up with us now and be the first one to know about our exclusive offers and product updates.
By submitting your information, you`re giving us permission to email you. You may unsubscribe at any time.


Follow Cap Puckhaber on Social Media


About the Author: Cap Puckhaber
Backpacker, Marketer, Investor, Blogger, Husband, Dog-Dad, Golfer, Snowboarder
Cap Puckhaber is a marketing strategist, finance writer, and outdoor enthusiast from Reno, Nevada. He writes across CapPuckhaber.com, TheHikingAdventures.com, SimpleFinanceBlog.com, and BlackDiamondMarketingSolutions.com.
Follow him for honest, real-world advice backed by 20+ years of experience.