How to Choose and Properly Load Your Backpack
By Cap Puckhaber, Reno, Nevada
If you’re like me, choosing the perfect backpack feels a little like choosing a best friend. This is the piece of gear that will carry everything you need for miles—food, water, shelter, clothing, and those small comforts, like my beloved trail spoon I always seem to forget. It’s got to fit just right, hold up through rough conditions, and ideally not break the bank. It’s a tall order for a piece of fabric and some straps, but its importance can’t be overstated. A bad pack can ruin a trip, while the right one becomes a trusted extension of your body.
I’ve been hiking and backpacking for years now, and I’ve gone through a few packs on my journey to find “the one.” I’ve used packs from major brands like REI, Gregory, and Osprey, and they’ve each had their strong points. I loved the REI Flash for its value and multi-use design during my early days. Then I moved on to the Gregory Baltoro for its sheer space and incredible pocket accessibility on longer treks. But the Osprey Atmos was the one that just fit my body best. That last part is the absolute key. Fit is deeply personal. It’s not just about size; it’s about your shape, your stride, your trip style, and what feels right for you. Let me walk you through everything I’ve learned—hopefully, it will help you find the right backpacking backpack for your next adventure.
It All Starts With You: Finding a Pack That Truly Fits

Before you ever walk into a gear shop or start browsing online, the first step is to get familiar with your own body. What’s your height, weight, waist size, and torso length? Most people know the first three, but that last one, torso length, is the golden ticket when it comes to choosing a backpack. Surprisingly, it has almost nothing to do with your overall height. I have a buddy who is six inches taller than me but we have the exact same torso length, so we can often swap packs. Your torso length and hip width determine how the pack will sit on your back, and that positioning determines everything else, from comfort and weight distribution to your overall endurance on the trail.
Why Your Torso Length is More Important Than Your Height
Think of your body as the foundation for a house. If the foundation isn’t measured correctly, the whole structure will be unstable. The same goes for your backpack. The frame of the pack needs to match the length of your spine from the base of your neck to the top of your hips. If the pack is too short, the weight will pull down on your shoulders, causing them to ache within the first hour. If it’s too long, it will sag and bump against your lower back, shifting the load off your hips, which are meant to carry the majority of the weight. This is why you’ll see packs sold in sizes like Small, Medium, and Large, which correspond to torso length ranges, not T-shirt sizes.
A Quick Guide to Measuring Your Torso at Home
Getting this measurement right is crucial, and you don’t need a fancy tool to do it. You just need a friend and a flexible measuring tape. First, tilt your head forward and feel for the bony bump at the base of your neck. That’s your C7 vertebra, and it’s the starting point for your measurement. Next, find the tops of your hip bones, placing your hands on your hips with your thumbs pointing toward your spine. The imaginary line drawn between your thumbs is your iliac crest, the shelf where your pack’s hip belt should sit. According to the experts at REI, the distance between that C7 vertebra and the line at your iliac crest is your torso length. Knowing this number before you shop will immediately narrow your options and save you a ton of time.
The Big Debate: Sizing Up vs. Sizing Down Your Pack’s Capacity
Once you know your frame size, the next big question is capacity, which is measured in liters. This number tells you how much stuff the pack can hold. You’ll see recommendations everywhere that connect trip length to pack size. For instance, weekend trips of one to three nights usually call for a 45–55 liter pack. Weeklong adventures might suggest you need something in the 60–75 liter range. These are great starting points, but they aren’t rigid rules. There’s a bit of a philosophical debate in the backpacking community about this. Some people advocate for buying a slightly larger pack than you think you need, giving you the flexibility to pack for different seasons or bring a few extra comforts. Others, myself included, are on the other side of that coin.
My Personal Philosophy on Pack Liters and Trip Length
I almost always “size down.” I prefer a 55-liter pack even when the guides say I should go with 60–65 liters for a particular trip. There’s a simple reason for this preference. A smaller pack forces me to be disciplined and pack light. It makes me question every single item I want to bring and ditch the non-essentials. It’s a mindset as much as it is a packing style.
When I have a huge 75-liter pack, I find myself filling the space just because it’s there. Suddenly, a camp chair, an extra book, and a third pair of socks seem like a good idea in my living room. On the trail, that extra weight is never worth it.
Just remember that “size” in backpack terms refers to capacity in liters, not the frame or hip belt size, as those are often adjustable. A 55-liter pack from ten different brands will fit ten different ways, which is why trying a few on is completely non-negotiable.
Comfort Is King: What I Learned After Miles of Sore Shoulders

Let’s be honest, comfort is the most important factor of all. A backpack can have every feature imaginable, but if it rubs your shoulders raw or constantly slides down your hips, you won’t care how many zippered compartments it has. You’ll just be miserable. I learned this the hard way on a trip through the Sierras with a pack that never quite fit right. It was a decent pack from REI, but it just wasn’t molded for my frame. I’m pretty broad in the shoulders with an average-length torso, and that pack never quite hugged my back. By the end of day two, I was constantly fiddling with the straps, trying to shift the aching load from one sore spot to another. It was a long, painful lesson in the importance of a perfect fit.
The Non-Negotiable In-Store Test Run
This is why I tell every new backpacker the same thing. You have to try a pack on before you buy it, preferably loaded with weight. Any good outfitter will have sandbags or other weighted items they can use to stuff a pack for you. Ask them to load it up with 20–30 pounds, then walk around the store for at least 15 minutes. Go up and down any stairs they have. Lean forward and side to side. Pay attention to any pinching, rubbing, or uncomfortable pressure points. The pack should feel like it’s hugging your back, with the hip belt securely gripping your hips. Most of the weight should feel like it’s sitting on your hips, not pulling down on your shoulders.
Understanding Load Lifters, Sternum Straps, and Hip Belts
A modern backpack is an amazing piece of engineering, with a system of straps designed to stabilize the load and make it feel lighter than it is. The hip belt is your workhorse; it should carry about 80% of the pack’s weight. The sternum strap, that little strap that clips across your chest, pulls the shoulder straps inward, preventing them from slipping off your shoulders and helping with stability. Finally, you have the load lifters. These are small straps that connect the top of the shoulder straps to the top of the pack frame. According to the gear gurus at Backpacker Magazine, cinching them down pulls the load closer to your upper back, preventing the pack from leaning away from you and pulling you off-balance. Learning how to adjust these three components on the fly is essential for all-day comfort.
The Difference a Ventilated Back Panel Makes on a Hot Day
My old Gregory pack felt roomy and strong, which was perfect for hauling a bit more weight. The Osprey Atmos, however, felt like it was molded to my back. The biggest reason for this was the mesh back panel. Osprey calls it their “Anti-Gravity” suspension, and it’s a suspended mesh panel that conforms to your back while also creating a massive air channel between you and the pack itself. On mile eight of a hot, dusty climb, that ventilation is everything. It stops that gross, sweaty, board-back feeling you get when a pack is plastered directly against you. It might seem like a small detail in the store, but on the trail, it makes a world of difference in your comfort and body temperature regulation.
Why Women-Specific Packs Are a Must-Try
It’s important to mention that most major brands offer women-specific versions of their flagship packs. These aren’t just smaller versions in different colors. They are designed from the ground up to accommodate different body shapes. Generally, women’s packs have shorter torso lengths, narrower shoulder harnesses, and hip belts that are canted and shaped differently to better fit the contours of a woman’s hips. The shoulder straps are also often S-curved to accommodate a woman’s chest. If you’re a woman, I strongly recommend starting your search with these models. Even some men with narrower shoulders or shorter torsos find that a women’s pack offers them a better fit.
A Breakdown of the Features That Actually Matter on the Trail
You’ll see a lot of features tossed around in product descriptions. Hydration sleeve. Trekking pole loops. Sleeping bag compartment. Top lid. Side pockets. The list goes on and on, and it can be overwhelming. After years on the trail, I’ve developed a strong opinion on what actually matters and what’s just marketing fluff. Certain features can make your life much easier, while others just add unnecessary weight and complexity. It’s all about finding the right balance for your hiking style.
Brain, Pockets, and Lids: How to Access Your Gear
This is where Gregory really shines. My old Baltoro had pockets for days, with side zip access, huge hip belt pockets, and multiple lid compartments. It was a dream for keeping my gear hyper-organized. Over time, I’ve become a bit more of a minimalist, but I still believe good pocket design is critical. Personally, I like having at least two hip belt pockets for snacks, my knife, and sunscreen. Stretchy side pockets are essential for water bottles or for stashing trash. A large front mesh pocket is also a must-have for me, as it’s the perfect place to stuff a wet rain jacket or a pair of camp socks that need to dry out.
Hydration Sleeves vs. Water Bottle Pockets: My Take
Most newer packs have an internal hydration sleeve designed to hold a water reservoir, and this is a pretty standard feature now. The convenience of drinking from a hose without stopping is fantastic. However, always check if the reservoir itself is included or if you need to buy it separately, as they often are. That being said, I’ve recently gone back to using water bottles in the side pockets. It’s an old-school method, but I find it’s much easier to see exactly how much water I have left. It also makes for faster filtering on the trail, since I can just grab a bottle without having to unpack the reservoir from inside my pack. I suggest trying both systems to see which one works better for you.
The Surprising Usefulness of Compression Straps
Compression straps are the straps on the sides and sometimes the front of your pack that you can cinch down. Their main job is to pull the load closer to your body and prevent the contents of your pack from shifting around, especially if the pack isn’t completely full. This helps reduce bounce and maintain your center of gravity. I’ve also found them to be incredibly useful for strapping on bulky gear that doesn’t fit inside my pack. I often use them to secure my tent or a foam sleeping pad to the outside of my pack, which frees up a ton of internal space.
Do You Really Need a Separate Sleeping Bag Compartment?
A lot of larger packs come with a zippered compartment at the bottom that’s specifically designed for a sleeping bag. The idea is that you can access your bag without having to unpack everything else on top of it. Some people absolutely swear by this feature. I’ve had packs with and without one, and I’ve found that while it’s a nice convenience, it’s not a deal breaker for me. If you’re a minimalist who uses a smaller quilt or a highly compressible down bag, you can easily manage without it. Sometimes that internal divider just gets in the way when you’re trying to pack larger, awkwardly shaped items like a bear canister.
My Step-by-Step Method for Packing a Balanced Backpack
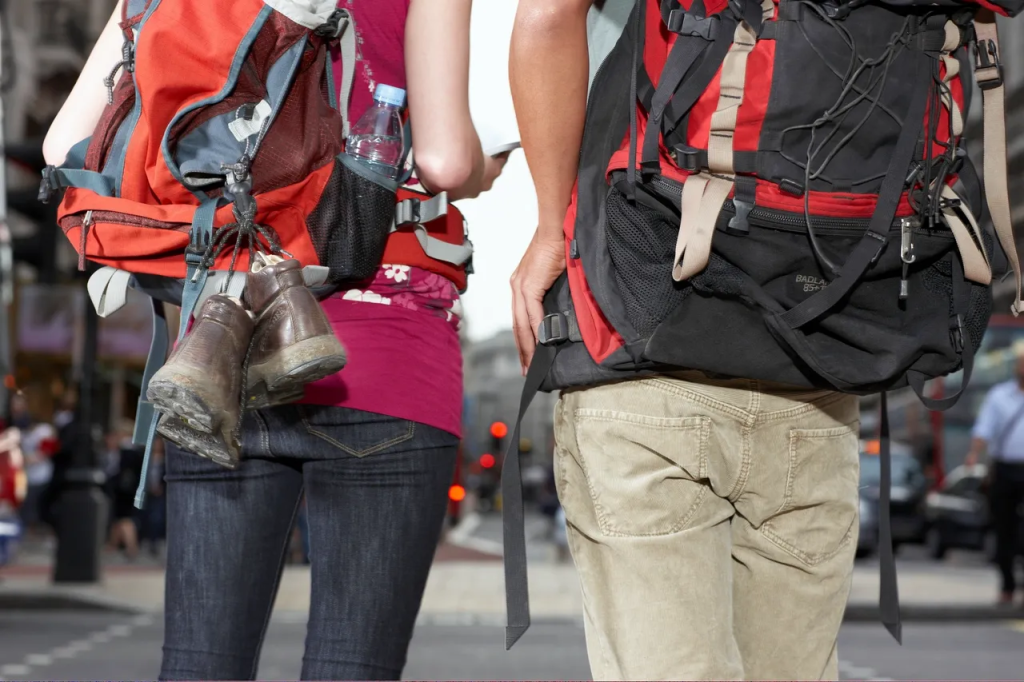
Once you’ve finally chosen your perfect pack, the next challenge is learning how to pack it efficiently. How you load your gear is just as important as the pack itself. A well-packed backpack distributes weight evenly, keeps your gear organized, and ensures your essentials are easily accessible. I learned early on that just randomly stuffing things inside is a recipe for an uncomfortable, unstable, and frustrating experience on the trail. It’s all about putting the right things in the right places based on their weight and when you’ll need them.
Image Alt Text: A diagram illustrating how to properly pack a backpacking backpack for optimal weight distribution, with heavy items placed near the center of the back.
The Foundation: Where to Put Your Sleeping Bag and Shelter
The very bottom of your pack is the best place for bulky but relatively light items that you won’t need until you make camp for the night. This is typically where I place my sleeping bag, stuffed into a waterproof compression sack. I’ll also often put my sleeping pad and any camp clothes in this zone as well. Placing these lighter, compressible items at the bottom creates a stable base for the heavier gear to rest on. It’s a bit like building a pyramid; you need a solid, wide foundation before you can start stacking the heavy stones on top.
The Core Weight: Placing Food and Heavy Gear
The most important packing principle is to place your heaviest items closest to your spine, ideally in the center of your back between your shoulder blades. This keeps your center of gravity stable and aligned with your hips, which prevents back strain and gives you much better balance on tricky terrain. My heaviest items are almost always my food, which I pack in a bear canister if required by the area, my cook kit, and my water reservoir if I’m using one. I make sure to nestle these items right up against the back panel of the pack. The difference you feel when this weight is in the right place is truly incredible.
Filling the Gaps with Lighter Items and Clothing
Once the heavy items are locked into their core position, I use my lighter and medium-weight gear to fill in the remaining space around them. My extra clothing layers, also packed in a dry sack, get stuffed into the gaps to create a dense, stable load that won’t shift around. My tent body and fly usually go in here as well. The goal is to create a compact and solid cylinder of gear inside your pack. Any empty space will allow items to move around as you hike, which can throw you off balance at the worst possible moment.
Using the “Brain” and Exterior Pockets for Essentials
Finally, think about everything you’ll need to access quickly and easily throughout the day without having to stop and hold a trail-side yard sale. These items belong in the top lid of your pack, often called the “brain,” or in your hip belt and side pockets. For me, this includes my headlamp, first-aid kit, map, snacks for the day, and my water filter. My rain jacket always goes into the large front mesh pocket where I can grab it the second I feel a drop of rain. Having these things at your fingertips makes you a much more efficient and prepared hiker.
The Three Packs I’ve Used: An Honest Comparison
My journey to the Osprey Atmos wasn’t a straight line. It involved years of using different packs and learning what I valued most. Each one taught me something different about fit, features, and function. My first real pack was from REI, the next was a massive Gregory, and my current favorite is the Osprey. Each one served me well at different stages of my backpacking career, and they all represent different philosophies in pack design.
The Budget-Friendly Starter: My Time with the REI Flash
I think many people get their start with REI’s house-brand gear, and for good reason. It offers fantastic value for the money. I started with an older model of the REI Flash, and it was a super affordable, lightweight, and surprisingly rugged pack. It was perfect for my first few years of weekend trips when I was still figuring things out. If you’re just getting started in backpacking, I always suggest testing the waters with a lower-cost pack like this and then upgrading once you really know your hiking style and what features are important to you. It’s a reliable workhorse that will get the job done without emptying your wallet.
The Heavy Hauler with a Million Pockets: The Gregory Baltoro
As my trips got longer and I started carrying more gear for winter or group trips, I upgraded to the Gregory Baltoro. This pack is a legendary heavy hauler, known for its plush suspension system and incredible organization. The hip belt felt like it was custom-molded, and it could comfortably handle loads of 50 pounds or more. Its pocket design is second to none, with compartments and access points for everything. If you are someone who loves organization or frequently carries a lot of weight, the Baltoro is an absolute beast and one of the most comfortable packs on the market for big loads.
The One That Fit Just Right: Why I Chose the Osprey Atmos AG
Right now, I mostly use the Osprey Atmos AG 55. It’s the perfect size for my typical 2–3 day trips and holds everything I need without tempting me to overpack. The main reason I love it is the fit. As I mentioned, that anti-gravity back panel conforms to my body perfectly, providing support without feeling stiff or sweaty. The size also helps me pack smart; if it doesn’t fit, I probably don’t need it. Osprey also has a killer warranty called the All Mighty Guarantee. I once sent in an older pack for a busted zipper, and they shipped it back good as new, no questions asked. That kind of customer service builds a lot of trust and loyalty.
Common Backpacking Mistakes I Made (So You Don’t Have To)
I’ve made just about every mistake you can make when it comes to backpacks. I’ve bought the wrong size, packed it incorrectly, and carried way too much weight. These experiences were often uncomfortable, but they taught me valuable lessons that I can now share. Avoiding these common pitfalls will save you a lot of literal pain in the neck, shoulders, and back on your own adventures. Learning from my blunders is a lot easier than making them yourself.
The Mistake of Buying a Pack Online Without Trying It On
My very first pack was an online purchase. I read a bunch of reviews, it had a great rating, and it was on sale. I clicked “buy” without ever having tried it on. When it arrived, I loaded it up and it just felt… wrong. The shoulder straps were too wide, and the hip belt dug into my sides. I thought I could “break it in,” but after one miserable 8-mile hike, I knew it was a lost cause. You would never buy hiking boots without trying them on, and your backpack is just as important. A review from someone on the internet, even a good one from a site like Outside Magazine, can’t tell you how a pack will feel on your unique body.
Ignoring the Importance of the Hip Belt
For the first year I backpacked, I thought the shoulder straps did all the work. I would crank them down as tight as I could, and then loosely buckle the hip belt around my stomach. My shoulders would be screaming by the end of every day. I was completely ignoring the most critical component of the suspension system. Your strong leg and hip muscles are designed to carry heavy loads, not your delicate shoulder and trapezius muscles. Once I learned to properly tighten the hip belt first, positioning it on the shelf of my hip bones and then lightly tightening the shoulder straps just for stability, it changed everything. The weight magically transferred from my shoulders to my hips, and I could hike twice as far with half the discomfort.
Overpacking Just Because I Had the Space
My Gregory Baltoro was a 75-liter pack. On my first trip with it, a simple two-night outing, I managed to fill it to the brim. I packed a camp chair, a hardcover book, a full-size pillow, and enough snacks to feed a small army. My pack weighed over 50 pounds. It was absolutely brutal. Just because you have the space doesn’t mean you should use it. Now, I use the size of my pack as a hard limit. This discipline has forced me to become a smarter, more efficient packer, and my back has thanked me for it every single step of the way.
Frequently Asked Questions From the Trail
After talking about gear with fellow hikers at campsites and in online forums like Reddit for years, I’ve noticed that the same few questions come up again and again. These are the practical, real-world concerns that people have when they’re investing in this crucial piece of gear.
Is an expensive backpack really worth the money?
This is probably the most common question I hear. Backpacks can range from under a hundred dollars to over four hundred. In my experience, you do get what you pay for, but only up to a point. A pack in the $200-$350 range from a reputable brand like Osprey, Gregory, Deuter, or Mystery Ranch will typically offer a huge jump in comfort, durability, and suspension technology compared to a budget option. They use higher-quality materials, more advanced frame designs, and often come with incredible warranties. However, once you get above that price point, you often start paying for highly specialized, ultralight materials or niche features that the average backpacker doesn’t really need.
How do I clean my backpack after a muddy trip?
Your backpack is going to get dirty. It’s a badge of honor. To clean it, never put it in a washing machine, as that can destroy the fabrics and coatings. Instead, the best method is to empty it out completely, then use a bathtub or a large sink. Fill it with cool or lukewarm water and a small amount of a gentle, non-detergent soap like Nikwax Tech Wash. Use a soft brush or sponge to gently scrub away the dirt and grime, paying extra attention to the zippers and straps. Once it’s clean, rinse it thoroughly and hang it to air dry completely, preferably out of direct sunlight.
Can I take my backpacking pack as a carry-on?
This really depends on the size of your pack and the airline’s specific rules. Generally, most packs under 45 liters can fit within carry-on size limits, provided they aren’t overstuffed. Packs in the 50-liter range and above will almost certainly need to be checked. If you do check your pack, I highly recommend buying a large, cheap duffel bag to put it in. This will protect all the straps and buckles from getting snagged and ripped off by the airport baggage handling machinery.
Final Thoughts on Your Hiking Companion
Choosing a backpack is an intensely personal decision, and there’s no single right answer. The perfect backpack is the one you forget you’re wearing halfway through the hike. It doesn’t chafe, it doesn’t bounce, and it holds everything you need and nothing you don’t. My journey took me from an REI pack to a Gregory and finally to an Osprey, but your path might be completely different. The goal is the same, to find that perfect partner for your adventures.
Don’t rush the process. Read reviews, talk to other hikers, and most importantly, try on as many packs as you can. When you find the right one, it will feel less like a piece of equipment and more like a part of you. I hope my experiences have helped you narrow things down a bit. If you’re gearing up for your own trip, whether it’s a quick overnighter or a multi-day trek on a National Park trail you found on nps.gov, feel free to reach out. I love hearing from fellow hikers, and I’m always happy to nerd out over gear. Happy trails!
About the author
Cap Puckhaber is a marketing strategist, finance writer, and outdoor enthusiast. He writes across CapPuckhaber.com, TheHikingAdventures.com, SimpleFinanceBlog.com, and BlackDiamondMarketingSolutions.com. Follow him for honest, real-world advice backed by 20+ years of experience.
Best Backpacking Gear Wish List

Join our Mailing List
Sign up with us now and be the first one to know about our exclusive offers and product updates.
By submitting your information, you`re giving us permission to email you. You may unsubscribe at any time.
Follow Cap Puckhaber on Social Media


About the Author: Cap Puckhaber
Backpacker, Marketer, Investor, Blogger, Husband, Dog-Dad, Golfer, Snowboarder
Cap Puckhaber is a marketing strategist, finance writer, and outdoor enthusiast from Reno, Nevada. He writes across CapPuckhaber.com, TheHikingAdventures.com, SimpleFinanceBlog.com, and BlackDiamondMarketingSolutions.com.
Follow him for honest, real-world advice backed by 20+ years of experience.

