
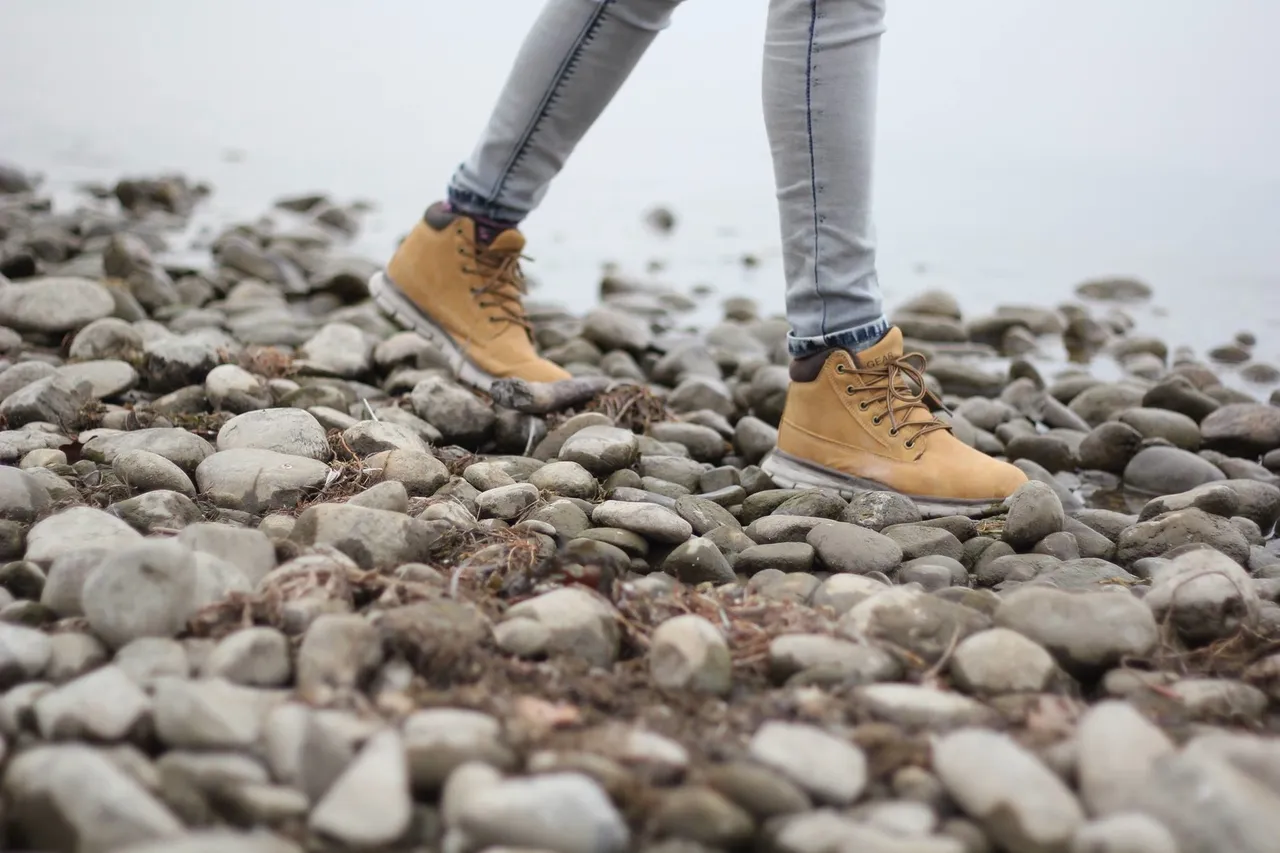
My 20-Year Journey in Finding the Right Hiking Boots
By Cap Puckhaber, Reno, Nevada
I’m Cap Puckhaber, and I’m a marketing professional, part-time blogger, and outdoor enthusiast. My first real backpacking trip over two decades ago was a complete disaster, but it wasn’t the pack weight, the rain, or my fitness level that nearly made me quit. It was my feet, because they were a raw, blistered, throbbing mess. I made the classic rookie mistake, so I bought a pair of stiff, heavy-duty boots simply because they looked professional, without any real thought for my foot shape, the trail type, or even a proper break-in period. I consequently learned the hard way that when it comes to hiking, your boots are the single most crucial piece of gear you own. This guide to books and avoiding foot pain will set you up for success.
This isn’t just about picking a stylish option; instead, it’s about finding a pair that suits your hiking habits, your unique foot shape, and your specific needs. It’s truly the difference between enjoying a breathtaking summit view and obsessing over the agonizing walk back to the car. I’ve spent 20 years making just about every mistake you can, from agonizing blisters to the hiker’s badge of (dubious) honor: losing toenails. Therefore, this is all the advice I wish I’d had from the start.
Why Your Hiking Boot Choice Is the Most Critical Gear Decision You’ll Make
We love to talk about the latest GPS watches, ultralight tents, and fancy rain jackets. But none of that matters if every single step you take is painful. Your feet are your engine and your suspension, so your boots are the tires. For example, putting the wrong tires on your car can lead to a rough ride or even an accident, and the same exact principle applies to your feet.
My First “Big” Hike Mistake
On that first disastrous trip, I had boots that were too narrow for my feet, although I didn’t know I had slightly wide feet at the time. I just knew that about three miles in, my pinky toes felt like they were in a vise. Then, by mile five, I could feel “hot spots” forming on my heels. I ignored them, thinking I just needed to “tough it out.” By the time I got to camp and pulled my (cotton!) socks off, I had blisters that looked like small, watery grapes, so the rest of the weekend was a miserable exercise in pain management, not hiking.
It’s More Than Just Comfort; It’s About Injury Prevention
That experience taught me that “comfort” is just the baseline, because the real goal is injury prevention. The wrong boot doesn’t just cause blisters; in fact, it can lead to rolled ankles if you don’t have enough support. It can also cause painful arch strain like plantar fasciitis, and of course, the dreaded black-and-blue toenails that eventually fall off. All of these things are preventable, but it just takes a little knowledge and a refusal to settle for a “good enough” fit.
First Things First: What Kind of Hiker Are You?
Before you even look at a boot, you’ve got to be honest with yourself about how you’ll use it. A boot designed for a thru-hiker on the Appalachian Trail is complete overkill, for example, for someone doing 4-mile loops at a state park. The materials, stiffness, and weight will all change based on your answer.
The Day Hiker (Well-Maintained Trails)
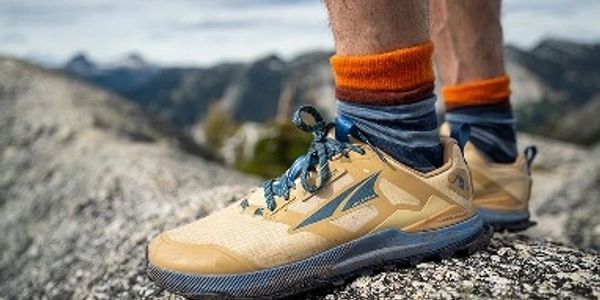
If you’re a weekend hiker who enjoys short day trips, then you can absolutely get away with a lightweight, flexible boot or even a sturdy trail runner. You’re probably hiking on well-maintained trails and not carrying a heavy pack. For these trips, I personally prefer a low-cut hiking shoe from a brand like Merrell, because these shoes have less structure. This is fine for shorter treks, and they’re much lighter and more breathable than a full-on boot.
The Weekend Warrior (Longer Distances, Varied Terrain)
This is where I find myself most of the time. We’re talking 8-15 mile days, or maybe an overnight trip with a 20-30 pound pack, and trails that are often rocky, root-filled, and have significant elevation changes. For this, I need more support. A mid-height boot with a more substantial sole is essential, because this provides the ankle support I need on uneven ground. It also provides the durability to handle the mileage without my feet feeling bruised by the rocks.
The Thru-Hiker (Multi-Day, Heavy Packs)
For those who tackle longer, multi-day hikes or very rugged terrains, a supportive and durable boot is non-negotiable. When you’re carrying a 40+ pound pack, all that weight is transferring through your feet. Consequently, a stiffer boot, often with a full-grain leather upper and a rigid sole, provides the stability and protection needed over extended distances and in unpredictable conditions. These are the boots that take a while to break in but last for a decade.
Decoding Hiking Boot Jargon: What Are You Even Buying?
The terminology on hiking boot boxes can be confusing, as it’s a mix of marketing and real engineering. I’ve learned to focus on three main components: the uppers, the midsoles, and the outsoles.
Uppers: Leather vs. Synthetic vs. Mesh
The “upper” is the main body of the boot. Full-grain leather is the classic choice; it’s incredibly durable and water-resistant but also heavy and requires a long break-in period. Synthetic materials, like nylon and polyester, are much lighter, break in faster, and breathe better, although they show wear and tear more quickly. I’ve owned both, and frankly, I now lean toward a hybrid boot that uses synthetic mesh for breathability and leather “overlays” in high-wear areas for durability.
Midsoles: The “Engine” of the Boot (EVA vs. PU)
The midsole is the part you can’t see, as it’s sandwiched between the insole and the rubber outsole. It provides the cushioning and stability. Most are made of EVA (ethylene vinyl acetate) or PU (polyurethane), and EVA is lighter and feels cushier, almost like a running shoe. However, it can compress and “pack out” over time. PU is firmer and much more durable, so for heavy-duty backpacking, I look for PU midsoles because I know they’ll support my feet and a heavy pack for hundreds of miles.
Outsoles: Lugs, Traction, and Rubber (Vibram)
The outsole is the rubber bottom of your boot. You’ll see the brand name Vibram on many high-quality boots, and for good reason; they make fantastic, grippy soles. What you want to look at are the “lugs,” which are the deep, patterned bumps that provide traction. Deeper, more aggressive lugs are great for mud and loose gravel. Also, a more defined “heel brake,” a distinct edge on the back of the heel, is a huge help in controlling your speed on steep descents.
The Great Waterproofing Debate (Gore-Tex and Beyond)
Many boots feature a waterproof-breathable membrane like Gore-Tex (GTX), which is great for crossing streams or hiking in the rain. I have a pair of GTX boots I love for wet, muddy spring hikes, but there’s a trade-off. That same membrane that keeps water out also traps sweat and heat inside. For example, on a hot, dry summer hike in Utah, I’d much rather have a non-waterproof, highly-breathable mesh boot that will dry in minutes if it does get wet.
The Big Three: Hiking Boots vs. Hiking Shoes vs. Trail Runners
This is a hot topic on hiking forums, and my opinion has changed over the years. There’s no one “right” answer, but only the right tool for the job.
When to Choose a Full-Fledged Boot (Ankle Support)
I stick with a traditional mid-or-high-cuff boot for two main reasons: heavy packs or rough terrain. That extra cuff height isn’t just about preventing a rolled ankle, although it helps. Instead, it also braces your entire foot and ankle complex, which reduces muscle fatigue on long days. When I’m scrambling over boulders or navigating a washed-out trail, I’m always glad to have that extra support.
The Case for Low-Cut Hiking Shoes
Low-cut hiking shoes are my default for most day hikes. They’re built on the same “chassis” as their boot counterparts, so they have a stiff sole and a protective toe cap. They’re just lighter and more agile because they don’t have the ankle cuff. Think of them as a beefed-up trail runner, as they’re perfect for established trails where ankle support isn’t my primary concern.
Why I Sometimes Switch to Trail Runners (And Why You Might)
I used to think hiking in trail runners was crazy, but then I tried it. For fast-and-light day hikes on smooth trails, they’re amazing. The weight saving is noticeable with every step, but the downside is the lack of protection. You will feel every sharp rock, and a stubbed toe is a real risk. I only use them when I’m carrying a very light pack and I know the trail conditions are good, which I often check on a resource like AllTrails beforehand.
How to Get a Perfect Fit (And Avoid the “Return of Shame”)
This is where the rubber meets the trail, literally. A boot that’s “your size” might not be “your boot.” Comfort and fit are paramount.
Your Foot Shape Is Everything: Width, Volume, and Arches
No two feet are the same. I learned I have wide feet, so I specifically look for boots that come in a “Wide” or “2E” width. If you have a narrow foot, then you’ll need a boot that provides a snug fit to prevent sliding. The shape of your arch is another critical factor, because some people have high, rigid arches, while others have low arches or flat feet. Brands like Oboz are famous for including a high-quality, supportive insole right out of the box, which is great for people who need extra arch support.
The Professional Fitting: Is It Worth It? (My REI Experience)
Finding the right hiking boot can require some expert guidance. I’m a huge advocate for going to a specialized outdoor store like REI and getting a professional fitting. I did this about ten years ago, and it was eye-opening. The staffer had me stand on a foot analysis machine and walk up and down a small, slanted ramp. He didn’t just measure my length; instead, he assessed my arch, my width, and my gait.
Measuring Your Stride and Foot (Pronation and Supination)
That fitting is where I learned I overpronate, meaning my foot rolls inward when I walk. This, of course, can cause strain on your feet and knees. People who supinate (roll outward) have a different set of issues. A good boot fitter can identify this and recommend a boot with the right kind of support to correct it. This small adjustment in footwear can prevent chronic pain, so this kind of professional fitting is invaluable. I highly recommend it; REI’s boot fitting advice is a great place to start your research.
The “Don’t” Example: Buying Boots Online Blindly
Here’s the mistake I see people make all the time. They read a “best boots” list online, find a good sale, and order a pair of boots without ever trying them on. This is a massive gamble, and you might get lucky. But you’ll more likely get a boot that doesn’t match your foot’s volume, width, or arch. I did this once and ended up with a pair of boots that gave me horrible heel blisters because my heel was lifting with every step. I couldn’t return them since I’d worn them outside, so it was an expensive lesson.
The Unspoken Agony: How Your Boots Are Costing You Toenails
Okay, let’s talk about the ugly side of hiking, specifically losing toenails. It’s a painful and frustrating consequence of long treks. For years, I thought this was just a “badge of honor” that meant you were a serious hiker, but I was wrong. In fact, it’s a sign that your gear or technique is failing.
Why Does Hiking Make You Lose Toenails?
Toenail loss almost always happens because of repeated trauma. Your foot is constantly moving, and on long hikes, your feet will swell up. As you hike, especially downhill, your foot slides forward inside your boot. Then, with every step, your toenail, particularly your big toenail, slams into the front of the boot. This repeated impact, thousands of times over, causes a bruise under the nail (a subungual hematoma), which eventually causes the nail to separate and fall off.
It’s All About Downhill Trauma (That Forward Slide)
Downhill hiking is the number one culprit. Gravity is pulling you and your pack forward, and your feet are sliding into the “toe box” of your boots. If your boots are too small, then there’s no room for this. Also, if your boots are too big or laced improperly, your foot slides around like a pinball. This pressure is what does the damage.
The Role of Moisture and Swelling
There’s another factor at play: moisture. After hours of hiking, your feet sweat. This moisture softens your skin and your toenails, which makes them much more prone to damage. Add in the natural swelling that occurs over a long day, and your boot, which felt perfectly snug in the morning, now feels tight and restrictive. This, of course, amplifies the pressure on your toes.
My Tried-and-True System for Preventing Toenail Loss
After losing more toenails than I’d like to admit, I developed a system. Now, I haven’t lost one in years, even on very long, rugged hikes.
Tip 1: The Right Fit (Again!) and the “Thumb’s Width” Rule
Properly fitting footwear is the most important step. When you try on boots, wear the exact socks you plan to hike in. Your shoes should be snug, but not tight. You should have enough room in the toe box to wiggle all your toes freely. The golden rule is to have a thumb’s width of space between your longest toe (which isn’t always your big toe) and the front of the boot, because this gives your foot room to slide forward on downhills without your nail hitting the boot.
Tip 2: Master Your Lacing Technique (Heel Lock)
This is my single best piece of advice. Most hikers just lace their boots up evenly, but the real trick is to lock your heel into the back of the boot so your foot can’t slide forward. You can do this with a “heel lock” or “surgeon’s knot.” By lacing the boot tighter over your instep, you create a secure pocket for your heel, which keeps your toes from ever touching the front. This is an absolute must, and I highly recommend learning how. Backpacker.com has an excellent guide on different lacing techniques.
Tip 3: The Art of Trimming Your Toenails (Not Too Short!)
This sounds simple, but it’s crucial. Before a big hike, make sure your toenails are trimmed properly. I usually do this two or three days before. You want to cut them straight across, not curved like your fingernails, as this helps prevent ingrown toenails. Be careful not to cut them too short, because that can cause its own discomfort. The goal is to have no nail extending past the fleshy part of your toe, so there’s nothing to catch or smash against the boot.
Beyond the Boot: The Gear That Really Saves Your Feet
Your boot is only half the system. What you put inside it is just as important. Consequently, I’ve become an absolute snob about two things: socks and insoles.
Why I’m a Snob About Hiking Socks (Merino Wool vs. Synthetic)
If you’re still hiking in cotton socks, please stop. Cotton absorbs sweat and holds it against your skin, so this makes your feet damp. This is, of course, the perfect recipe for blisters. I only hike in merino wool or synthetic socks from brands like Smartwool or Darn Tough, because these materials “wick” moisture away from your skin, keeping your feet dry and comfortable. I always pack an extra pair and change them midday on a long hike, and it feels like a brand-new start for your feet.
The “No Cotton” Rule: A Hiking Commandment
This rule applies to everything, not just socks. Cotton kills, as the old saying goes. It loses all its insulating properties when wet and takes forever to dry. This applies to your t-shirt, your pants, and especially your socks. Stick to wool or synthetics for your entire hiking kit, as it’s a fundamental principle of staying safe and comfortable. It is also something I see new hikers overlook all the time.
Insoles: Do You Need Aftermarket Support?
The insoles that come with most boots are, frankly, just flimsy pieces of foam. They offer very little structure or support. If you have foot issues like high arches or plantar fasciitis, then a good aftermarket insole from a brand like Superfeet can be a lifesaver. These provide a structured heel cup and arch support that the boot’s insole lacks. For me, they help correct my overpronation and reduce foot fatigue significantly.
Common Questions I Get About Foot Care on the Trail
Over the years, friends and other hikers have asked me a lot of questions. Here are a few of the most common ones.
What about plantar fasciitis?
Plantar fasciitis is a stabbing pain in the heel, and it’s caused by inflammation of the tissue that runs along the bottom of your foot. I’ve struggled with it myself. For hikers with this condition, you need a boot that offers excellent arch support and cushioning. A boot with a stiffer sole is often better, as it prevents your foot from flexing too much. This is where those aftermarket insoles are not just a luxury; instead, they are an absolute necessity.
What’s in my foot-care first-aid kit?
Being prepared is key. I never go on a hike without a small, dedicated foot-care kit. It’s light and saves a ton of pain. My kit always includes blister bandages (like Compeed or Moleskin), a small pair of nail clippers, some antiseptic cream, and a bit of athletic tape. The moment I feel a “hot spot,” I stop and put Moleskin on it, so don’t wait until it’s a full-blown blister.
How do you “break in” new hiking boots?
The “break-in” period is all about letting the boot mold to your foot and letting your foot get used to the boot. My process is simple. I start by just wearing them around the house for a few evenings. Then, I’ll wear them on a few short walks around my neighborhood. After that, I’ll take them on an easy 3-5 mile local hike. I would never, ever wear a brand-new pair of boots on a long, strenuous backpacking trip, because that’s just asking for trouble, as I learned all those years ago.
What About Your Budget?
Hiking boots can get expensive, with some high-end pairs costing hundreds of dollars. But just because a boot is expensive doesn’t mean it’s the right one for you.
Where to Spend and Where to Save
My philosophy is to spend your money where it matters most: on your feet and your back. I will always invest in high-quality boots, good socks, and a well-fitting backpack. You can save money on things like t-shirts or a water bottle. A $200 pair of boots that fits perfectly and lasts for 500 miles is a much better value, for example, than a $90 pair that falls apart or destroys your feet.
Are Expensive Boots Always Better?
Not necessarily. “Expensive” often means “more features,” like full-grain leather or advanced waterproofing. If you’re a day-hiker on easy trails, then those features are just extra weight and cost. The “best” boot is the one that fits your foot and your hiking style. I’d take a perfectly-fitting $130 Merrell boot over an ill-fitting $300 boot any day of the week.
Final Thoughts from the Trail
Choosing the right hiking boot is a journey. It’s about finding the perfect partner for your feet that will carry you thousands of miles. It took me years of trial and error, but my feet are much happier for it. Don’t rush the process. Go to a good store, like those you can find on the National Park Service’s partner list to support retailers who know their stuff. Try on multiple pairs, and walk around the store for at least 15 minutes.
Your feet are your foundation on the trail. By investing the time to find the right boot, mastering your lacing, and bringing the right socks, you’re not just buying gear. Instead, you’re buying hundreds of miles of comfortable, pain-free adventures.
Call to Action: Your feet are your most important piece of hiking gear, so treat them right. What’s the one boot-fitting or foot-care tip that saved your hike? Share your own hard-won wisdom in the comments below.
About the author
Cap Puckhaber is a marketing strategist, finance writer, and outdoor enthusiast. He writes across CapPuckhaber.com, TheHikingAdventures.com, SimpleFinanceBlog.com, and BlackDiamondMarketingSolutions.com. Follow him for honest, real-world advice backed by 20+ years of experience.
Trail Runner and Hiking Shoe Guide
Field Guide to Hiking Clothes and Gear Care

Join our Mailing List
Sign up with us now and be the first one to know about our exclusive offers and product updates.
By submitting your information, you`re giving us permission to email you. You may unsubscribe at any time.


Follow Cap Puckhaber on Social Media


About the Author: Cap Puckhaber
Backpacker, Marketer, Investor, Blogger, Husband, Dog-Dad, Golfer, Snowboarder
Cap Puckhaber is a marketing strategist, finance writer, and outdoor enthusiast from Reno, Nevada. He writes across CapPuckhaber.com, TheHikingAdventures.com, SimpleFinanceBlog.com, and BlackDiamondMarketingSolutions.com.
Follow him for honest, real-world advice backed by 20+ years of experience.