
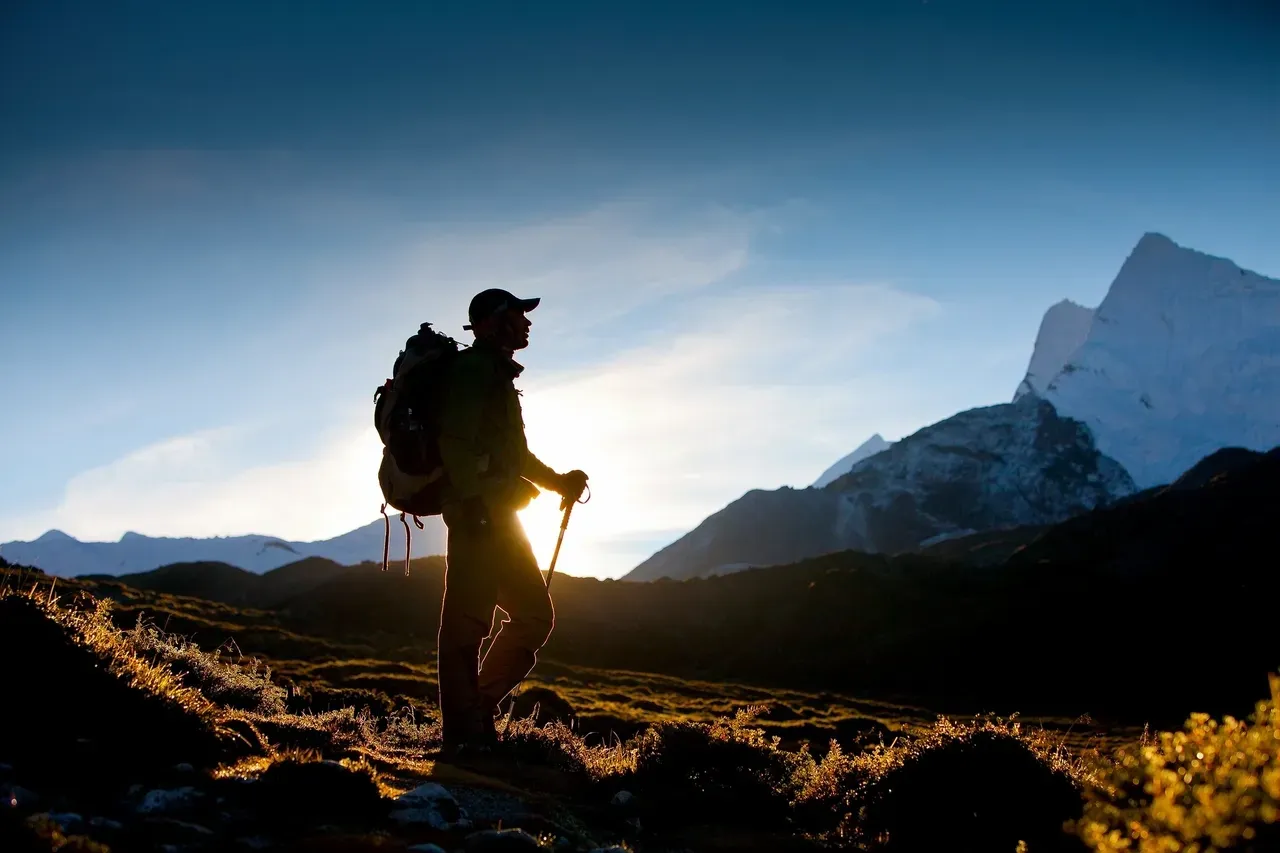
Should You Hike With Trekking Poles?
By Cap Puckhaber, Reno, Nevada
I’ll be honest, for years I thought trekking poles were… well, a bit much. I’d see hikers clacking their way up a simple trail and roll my eyes. I’m Cap Puckhaber, and as a hiker based here in Reno, I’ve spent thousands of hours on the trails around Tahoe and the Sierra. I always figured my own two feet were enough. My legs were strong, my balance was fine. I saw hiking poles as a crutch for people who weren’t “serious” hikers. Then, I did a 22-mile day-hike on the Tahoe Rim Trail with a buddy.
The ascent was fine. The descent, however, was brutal. My knees were screaming by the last five miles. My friend, who had been using his poles all day, looked fresh. He offered me one of his poles. I was desperate, so I took it. The relief was not subtle. It was immediate. Just having that one pole took so much pressure off my downhill knee. It was a complete “aha” moment for me. I went home, iced my knees, and immediately started researching. I was wrong. Completely, totally wrong. Now, I’m a total convert. I use them on almost every hike, and my body thanks me for it. This post is everything I’ve learned since that day—why they work, how to choose the right pair for your needs, and how to actually use them, because I see people making mistakes all the time.
My Big “Aha” Moment: From Skeptic to Believer
My journey from trekking pole skeptic to evangelist really solidified on a hike up Mount Rose, just outside of Reno. It’s a trail I know well. It’s a solid climb with a fantastic reward at the top. This time, I had my first pair of “real” hiking poles, not just the one I borrowed. Going up, I immediately noticed a difference. I shortened them a bit and used my arms to help pull me up the switchbacks. It felt like I had an extra set of muscles. My legs felt fresher, and my pace was faster. I was engaging my lats, my shoulders, and my core. It was a full-body workout, not just a leg-day. But the real magic, just like my first experience, was on the way down.
The descent from Mount Rose is long and can be tough on the joints. Normally, I’d be doing the “old man shuffle,” carefully picking my way down to avoid jarring my knees. With the poles, which I lengthened for the descent, I could move with so much more confidence. I could “brake” with my arms, planting the poles out in front and letting them absorb the shock. When I got back to the car, the usual post-hike soreness in my knees was gone. I wasn’t just less sore; I felt like I could go for another few miles. That was it. I’ve been on team trekking pole ever since.
What’s the Real Difference? Trekking Poles vs. Hiking Poles vs. Walking Sticks
You’ll hear a lot of different terms thrown around: trekking poles, hiking poles, and walking sticks. While they all help you walk, there are some small distinctions. A “walking stick” is usually what you think of in the classic sense—a single, often wooden staff. It’s great for balance on relatively flat terrain but doesn’t provide the same level of symmetrical support or joint-saving benefits.
You’ll see folks using them for a casual stroll in the woods. “Hiking poles” and “trekking poles” are terms that are now used pretty much interchangeably. If there’s a difference at all, “trekking poles” often implies a more technical piece of gear. They almost always come in pairs, are adjustable in length, and are built for multi-day trips (or “treks”). They’re designed to be lightweight, strong, and collapsible. “Hiking poles” might refer to a simpler, sometimes non-adjustable pair, but honestly, everyone in the outdoor gear world, from brands to publications like , uses the terms to mean the same thing. For the rest of this article, I’ll be using them interchangeably. The important thing is that they are used in pairs to give you that four-legged stability.
The Core Benefits: How Hiking Poles Genuinely Change Your Hike

It’s not just about one thing. The benefits of using poles compound on each other, making your hike safer, more comfortable, and ultimately, more enjoyable. When I finally gave in and tried them, I couldn’t believe what I’d been missing. It was like I had unlocked a new level of hiking.
Stability and Balance: Your Two Extra Feet
This is the most obvious benefit. Hiking poles are, at their most basic, two extra points of contact with the ground. Think of it as going from two-wheel drive to four-wheel drive. This added stability is incredible on tricky terrain. I’m talking about loose scree, slippery mud, or snowfields. I’ve lost count of the number of times my poles have caught me from a nasty slip that would have ended with me on my backside. And then there are stream crossings. Here in the Sierra, spring melt means trails turn into creeks, and creeks turn into rivers.
Trying to hop across slick, wobbly rocks with a 30-pound pack is a recipe for a cold, dangerous plunge. With two poles, you can create a stable “tripod” with your feet. You plant your poles, test the rock, and move with confidence. This single benefit is reason enough to carry them, especially if you hike in wet conditions or in the shoulder seasons.
Saving Your Knees: The Joint-Protection Factor
This was the benefit that converted me. Our bodies are amazing, but they aren’t designed for the repetitive, high-impact shock of a long downhill hike with a heavy backpack. Every step you take downhill sends a jolt through your ankles, knees, and hips. Multiply that by thousands of steps, and you’re doing real, cumulative damage.
Trekking poles act as shock absorbers for your entire body. When you use them correctly, especially on descents, you transfer a significant portion of your body weight and pack weight from your legs to your arms and shoulders. I went looking for data on this after my “aha” moment and found studies confirming it. Some reports, like those in authoritative outdoor guides, suggest that poles can reduce the compressive force on your knees by as much as 25% on a descent. That is a massive number. It’s the difference between feeling good the next day and wincing every time you see a flight of stairs.
Going Further, Feeling Stronger: Endurance and Posture
This benefit is one I didn’t expect. I thought poles would just help with stability. But I quickly found I was less tired at the end of the day. When you hike, especially uphill, you’re usually just using your leg muscles—your quads, glutes, and calves. That’s a huge burden on one muscle group. When you start using trekking poles, you bring your upper body into the action. By planting your poles and pushing, you’re engaging your arms, shoulders, chest, and back. You are distributing the effort across your entire body.
This means your legs don’t fatigue as quickly, which means you can hike longer, faster, or just feel better when you reach camp. It also has a great side-effect on your posture. Hiking with a heavy pack often causes people to hunch forward. Poles naturally encourage you to stand up straighter, which opens up your chest and helps you breathe more deeply and efficiently. It’s a positive feedback loop of better posture, better breathing, and better endurance.
When to Bring Your Poles (And When to Leave Them Strapped to Your Pack)
Now that I’ve sold you on them, I have to be clear: I don’t use them 100% of the time. While they are a critical piece of my hiking gear, there are times when they are overkill. Knowing when to use them is just as important as knowing how to use them.
The “Must-Have” Scenarios: Steep, Slippery, and Long Hauls
I absolutely will not hike without my poles in a few specific situations. The first is any hike with significant elevation change. If I know I have a long, steep ascent or a quad-burning descent, the poles are coming. The uphill propulsion and the downhill joint-saving are just too valuable to leave behind. The second “must-have” scenario is any trail with challenging terrain. This includes rocky, uneven trails, hikes with multiple stream crossings, or any hike in wet, muddy, or snowy conditions.
The stability they provide in these situations is a massive safety boost, aligning with the kind of preparedness urged by sources like the National Park Service in their hiking safety guides. The final non-negotiable for me is backpacking. The moment you put a 20, 30, or 40-pound pack on your back, your center of gravity shifts, and the strain on your body multiplies. Trekking poles are essential for backpackers. They help you carry that load more efficiently and distribute the weight, taking an enormous amount of stress off your legs and back. Honestly, I’d rather forget my camp pillow than my trekking poles on a multi-day trip.
My “Don’t Bother” List: When Poles Are Just Extra Weight
This is my big “don’t” for you. Please don’t be the person who brings poles on a simple, flat, well-maintained trail. If you’re going for a short walk on a paved nature path or a wide, smooth dirt trail, the poles are more of a hindrance than a help. They’ll just clack on the ground, get in your way, and you won’t get any of the real benefits. On these easy trails, I find they just add weight and make me feel clumsy.
The same goes for certain types of trails. If I’m on a very narrow, brushy trail, sometimes the poles get caught on the surrounding bushes, and it’s more annoying than it’s worth. Or if a trail requires a lot of rock scrambling where I need my hands to be free, I’ll collapse my poles and strap them to my pack for that section. The key is to be adaptable. They are a tool, and you should only use the tool when it’s right for the job.
A Hiker’s Guide to Choosing the Right Trekking Poles
Okay, so you’re convinced. You head to an outdoor store or browse online and are immediately overwhelmed. Carbon fiber, aluminum, cork grips, lever-locks… it’s a lot. I’ve tried a bunch of different types, and here’s my breakdown of what actually matters.
Material Match-Up: Carbon Fiber vs. Aluminum
This is the biggest choice you’ll make. Most poles are made of either aluminum or carbon fiber. Aluminum poles are the reliable pickup truck of the hiking world. They are durable, dependable, and relatively inexpensive. Their best feature is that they can take a beating. If you fall or get one wedged between rocks, the aluminum will likely bend. A bent pole is often still usable, and you can sometimes (carefully) bend it back. Carbon fiber poles are the high-end sports car.
They are significantly lighter and are fantastic at dampening vibration. You feel less “chatter” coming up the pole into your hands. This is a huge plus on very long hikes. The downside? They are more expensive. And more importantly, they don’t bend—they break. If you put too much lateral stress on a carbon pole, it can snap. A snapped pole is completely useless. My advice? If you’re a beginner or a bit clumsy, start with aluminum. If you’re an ultralight hiker or backpacker and are careful with your gear, the weight savings of carbon is very nice.
Finding Your Fit: Adjustability and Sizing
Almost all modern trekking poles are adjustable. This is a critical feature. You need to be able to change the length of your poles for different terrain. The general rule of thumb is to set the pole length so your elbow is at a 90-degree angle when you’re holding the grip and the tip is on the ground. This is your “home base” length for flat terrain. You’ll want to shorten the poles a few centimeters for going uphill. This lets you plant them more easily and use them to push yourself up. Conversely, you’ll lengthen them a few centimeters for going downhill. This allows you to reach further down the slope to plant them, providing better balance and braking. Having adjustable poles is key to unlocking their full potential. Fixed-length poles are really only for trail runners or people who only hike on perfectly flat ground.
Let’s Talk Locks: Lever-Lock vs. Twist-Lock
This is a personal preference, but I have a very strong opinion. Poles are adjusted using one of two mechanisms: a twist-lock or a lever-lock (also called a flick-lock). Twist-locks are the older style. You twist the sections of the pole to tighten and loosen them. They are more compact, with no external parts to snag. However, I personally find them unreliable.
I’ve had them fail on me. They can be hard to tighten properly, especially with cold or wet hands, and they can suddenly collapse under weight. It’s not fun. Lever-locks are external clamps that you flip open and closed. They are fast, easy, and secure. You can see at a glance if the pole is locked. Even with thick winter gloves on, you can pop the lever, adjust the length, and clamp it shut. They are, in my opinion, far superior and more reliable. This is one feature I won’t compromise on. I will always choose a pole with a lever-lock.
Getting a Grip: Cork, Foam, and Rubber Handles
The grip is what you’ll be holding all day, so it matters. You’ll find three main types. Rubber grips are durable and cheap, but they are best for casual or cold-weather use. In the summer, they get slippery when your hands sweat and can cause blisters. I’d avoid them for serious hiking. Foam grips are a great option. They are soft, lightweight, and absorb moisture from your hands very well. They are comfortable and a popular choice on many lightweight poles. My personal favorite, however, is cork. Cork is a fantastic material. It’s firm and supportive, it wicks sweat well, and over time, it slowly molds to the specific shape of your hand. It just gets more comfortable the more you use it. Many high-end poles use cork, and for good reason.
The Shock Absorption Debate: Is It Worth It?
Some poles come with built-in shock absorbers, usually a spring mechanism inside the pole. The idea is that they provide even more shock absorption, especially on hard-packed trails or downhill sections. Some people love this feature and swear it reduces fatigue in their wrists and elbows. I am not one of those people.
I’ve tried poles with shock absorption, and I find they feel “mushy.” There’s a slight but noticeable bounce with every plant. It feels less secure to me, and it adds weight, complexity, and another part that can potentially break. I prefer a solid, rigid pole that gives me instant, predictable feedback from the trail. This is a purely personal preference, so if you have wrist or elbow issues, it might be worth trying. For me, it’s an unnecessary feature.
How to Actually Use Trekking Poles (Because Most People Get It Wrong)
Buying the poles is the easy part. Using them effectively takes a little practice. I see hikers making two huge mistakes all the time: using the straps incorrectly and not adjusting the pole length for the terrain.
Adjusting Pole Length for the Terrain
As I mentioned before, your 90-degree elbow bend is for flat ground. That is not the optimal length for the whole hike. When you start heading uphill, you need to shorten your poles. If they’re too long, you’ll feel like you’re trying to plant them way out in front of you, which is awkward and inefficient. Shorten them by 5-10 cm so you can plant them beside you and push off. The opposite is true for going downhill.
This is where they save your knees. You need to lengthen your poles by 5-10 cm. This allows you to reach down the slope and plant them in front of you before you step. This creates a stable brace for you to step down against, taking the impact into your arms instead of your knees. It feels strange at first, but once you get the hang of adjusting on the fly, it becomes second nature.
The Strap Secret: How to Use Them Correctly
This is the single biggest, most important tip I can give you. If you walk away with one thing, let it be this. Almost every hiker I see on the trail is using their pole straps wrong. They grip the pole handle like a baseball bat and maybe slide their hand through the loop. This is completely backward. Gripping the pole handle tightly all day will fatigue your hands, wrists, and forearms. Here is the correct way: put your hand up through the bottom of the strap, then pull down and grip the handle.
The strap should rest snugly across the back of your hand and around your wrist. When you do this, you can let your hand relax. You don’t even need to grip the pole. The weight of your arm pushing down on the strap is what transfers the force to the pole. Your hand is just there to guide it. This is the secret. This is how you can hike all day without hand cramps. It allows your arm to push and brake using the strong, stable platform of the strap, not your tired grip.
Storing Poles on Your Pack
There will be times you need your hands free, like for a scramble or a long, flat road-walk. Every good hiking backpack has a way to stow your poles. Usually, there are two loops or attachment points, one at the bottom and one on the side or shoulder strap. Practice collapsing your poles and attaching them to your pack at home. You want to be able to do it quickly on the trail. Collapsed poles should be secured tightly so they don’t swing around and hit you or another hiker. And please, collapse them before you walk into a visitor center or a brewery.
My Top Recommended Hiking Poles That Won’t Break the Bank
While I won’t name an “ultimate” pole, I can share some specific models I’ve used or seen perform reliably on the trail, especially from the original list I put together. These are all fantastic options under or around $100.
The All-Around Workhorse: Black Diamond Trail Pro Shock Trekking Poles
I have a soft spot for Black Diamond gear. While the “Pro Shock” model has the shock absorption I’m not crazy about, the regular Black Diamond Trail series is a fantastic place to start. They are durable, have great grips, and feature the lever-lock system (they call it FlickLock) that I trust. They are a bit heavier than carbon, but they are built to last forever. They’re a true workhorse.
The Lightweight Champ: Cascade Mountain Tech Carbon Fiber Trekking Poles
These poles are famous for a reason. Cascade Mountain Tech basically broke the market by offering carbon fiber poles at a ridiculously low price, often under $50. Are they as refined as a $180 pair from a high-end brand? No. But they are lightweight, have decent lever-locks, and come with both cork and foam grip options. I recommend these to everyone who wants to try carbon fiber without a huge financial commitment. They are an incredible value.
Other Great Contenders: Hiker Hunger, Foxelli, and Mountainsmith
I’ve seen plenty of other brands on the trail that hikers love. Poles from Hiker Hunger and Foxelli are also in that budget-friendly carbon fiber category and get great reviews. Mountainsmith is another classic, dependable brand, and their Peak 2.0 poles are a solid aluminum choice that will stand up to years of abuse. You don’t have to spend a fortune to get a quality pair of poles that will save your knees.
Common Questions I Get About Hiking Poles
I get asked about my gear all the time at trailheads. Here are the most common questions and my straight answers.
Are trekking poles necessary for beginners?
I’d argue they are especially helpful for beginners. When you’re new to hiking, your “trail legs” and balance aren’t as developed. Poles provide a huge confidence boost. They give you stability as you get used to moving on uneven ground and help you learn to pace yourself. Plus, they’ll help prevent that crippling next-day soreness, which makes you more likely to want to go hiking again. I wish I had started using them years earlier.
Can I use just one trekking pole?
You can, but you’d just be using a “walking stick,” which will only give you an extra point of balance. This is certainly better than nothing, and many thru-hikers will opt for a single pole to save weight. However, you will not get the full benefits. You’ll miss out on the symmetrical, full-body workout, the propulsion power, and the maximum joint-saving effect. You’ll also be working your body asymmetrically. I always recommend using a pair.
How do I maintain my trekking poles?
This is so simple, but people forget. Your poles get wet, muddy, and dusty. After a hike, especially a wet one, take a minute to pull the sections apart. Wipe them down with a dry cloth and let them air dry completely before you collapse them for storage. If you store them wet, the insides can corrode, and the locking mechanisms can get gummed up and fail. Just keep them clean and dry, and they will last for thousands of miles.
Final Thoughts from the Trail
My final piece of advice is simple: just try them. If you’re skeptical like I was, borrow a pair from a friend. Rent a pair from an outdoor shop. Buy a cheap, well-reviewed pair like the Cascade Mountain Techs and take them on your next real hike. Use the straps correctly. Adjust them for the uphill and the downhill. Feel the difference when you’re powering up a switchback and, more importantly, feel the lack of pain in your knees on the way down.
They might feel a little awkward for the first mile. But I promise, by the time you get back to your car, you’ll be a convert. They’re not a crutch. They’re a tool. And they’re one of the best tools I’ve found to make hiking safer, more comfortable, and something I can hopefully keep doing for decades to come. I’m Cap Puckhaber. Thanks for reading, and I’ll see you on the trail. Call to Action: Enjoy this post? Check out my other gear reviews and trail guides on TheHikingAdventures.com.
About the author
Cap Puckhaber is a marketing strategist, finance writer, and outdoor enthusiast. He writes across CapPuckhaber.com, TheHikingAdventures.com, SimpleFinanceBlog.com, and BlackDiamondMarketingSolutions.com. Follow him for honest, real-world advice backed by 20+ years of experience.
Backpacking and Hiking Gear Guide
Best Backpacking Gear Wish List
What is Rucking and Is It Good For You
Join our Mailing List
Sign up with us now and be the first one to know about our exclusive offers and product updates.
By submitting your information, you`re giving us permission to email you. You may unsubscribe at any time.


Follow Cap Puckhaber on Social Media


About the Author: Cap Puckhaber
Backpacker, Marketer, Investor, Blogger, Husband, Dog-Dad, Golfer, Snowboarder
Cap Puckhaber is a marketing strategist, finance writer, and outdoor enthusiast from Reno, Nevada. He writes across CapPuckhaber.com, TheHikingAdventures.com, SimpleFinanceBlog.com, and BlackDiamondMarketingSolutions.com.
Follow him for honest, real-world advice backed by 20+ years of experience.