
Naturehike VIK 2 Tent Review After Three Years of Condensation Problems
By Cap Puckhaber, Reno, Nevada
I bought the Naturehike VIK 2 to cut weight on solo trips. Three years later, I finally understand the catch that comes with that savings. My wife and I share a Nemo Dagger OSMO 2P for trips together. That tent weighs over four pounds and eats up real space in a shared pack. So when I started planning solo overnights, I wanted something smaller and quicker to pitch. I found the VIK 2 through a mix of Amazon reviews and a few YouTube gear channels, all recommending it for the reasons I was hunting for.
Every one of those reviews said the same three things. Small, lightweight, and easy to pitch. After three years of trips, I can confirm all three claims hold up. Almost none of those reviews spent real time on what happens once you zip the door. That is once you go to sleep, though. This gap in the reviews is the reason I wanted to write my own. The condensation problem I ran into deserves more than a passing comment.
What you actually get with the VIK 2
This tent ships as a single wall design. That means the tent body and the rainfly are one continuous piece of fabric instead of two separate layers. This single piece build is the main reason it packs down so small. Mine compacts to roughly the size of a Nalgene bottle. It still surprises me every time I pull it out of my pack. Naturehike lists the packaged weight for the two person VIK at around 1.62 kilograms, or 3.57 pounds. That figure includes the poles, stakes, guy lines, and the included footprint.
The outer layer uses 150D nylon with a silicone coating, rated to 2000mm of waterproofing. Its floor is 200D nylon, rated to 4000mm. Those numbers sound abstract. But they explain why the floor has survived three years of rocky campsites without a puncture. The poles are 7071 aluminum alloy, lighter than the poles on most double wall tents I own. Because they are thinner, I handle them more carefully than I would a heavier tent. I have never had one bend or crack.
What comes in the box
Naturehike includes more than just the tent body and poles. My VIK 2 arrived with nine stakes and three wind ropes. It also came with a fitted floor mat sold as a matching accessory. Everything fits inside a single stuff sack roughly the size of a one liter water bottle once compressed.
The stuff sack itself weighs almost nothing. So I never bother swapping it for a lighter one, the way I do with some other gear. I keep a small repair patch kit in a side pocket of my pack anyway. A torn single wall tent has no backup layer to fall back on. I also carry two spare stakes, since the thin aluminum ones that ship with the tent are easy to lose in tall grass or leaf litter.
Setup, freestanding design, and the pole orientation trick
Naturehike markets the VIK as freestanding, and it mostly is. You lay the included floor mat down first. Then you insert the poles into the tent body. You clip the fabric onto the poles next. Once every clip is set, you can lift the whole structure and move it before staking it down. That flexibility has saved me more than once. It helped most on a night when my first pitch spot hid a rock I could not see in the dark.
Here is the detail that tripped me up the first time I set up the tent. It looks symmetrical from a distance, but one end runs slightly wider than the other. That wider end is the head end. It determines which direction the poles need to face before anything clips into place. I set the poles up backward on my first two trips. Both times I had to break the tent down and start over. Once you know to check the width first, setup takes under three minutes.
Single wall construction, and what it actually gets you
A single wall tent skips the separate rainfly and inner mesh body that double wall tents use. The whole structure becomes one waterproof layer with mesh panels sewn in for airflow. That choice removes an entire layer of fabric. It also removes the extra clips and poles needed to attach a separate fly. For me, the biggest win is speed. I can have the VIK 2 staked out before my wife finishes unpacking her tent bag. On a night when a storm is rolling in, that speed matters more than most gear reviews admit.
Weight is the other clear win. There is no separate fly and less total fabric. Because of that, single wall tents almost always beat double wall tents of the same size on the scale. The VIK 2 undercuts most double wall two person tents by a full pound or more.
Over a multi day trip, that difference adds up in your shoulders and your knees. A single pound sounds small until you carry it up switchbacks for three days straight. Packed size follows the same math. Less fabric means a smaller stuff sack. That is why the VIK 2 compacts down close to the size of a Nalgene bottle, leaving more room in my pack for food and water.
Vestibule space and everyday use
The VIK 2 includes a single vestibule at the entrance, and it holds more gear than its size suggests. My 50 liter pack fits under the vestibule with room left over for my boots and trekking poles. I still bring everything I can inside the main sleeping area on wet nights, though. A vestibule only blocks rain, not the ground moisture that seeps up from below. The interior floor measures close to 85 by 210 centimeters for the one person layout. That felt tight for two adults but generous for one person plus a dry bag of gear.
I have cooked breakfast under the vestibule on cold mornings, though I always keep the stove near the open edge for airflow. Smoke and steam from a camp stove add moisture to an already humid tent, so I try to keep cooking sessions short when I am inside a single wall shelter. The single door design does mean you have to climb over your own gear to get in and out, which is a small tradeoff compared to the two door layout on my wife’s tent.
How the VIK 2 compares to other single wall tents
Plenty of other single wall options exist. I looked at a few others before I bought mine. The Naturehike Vik 1P is the one person version of my tent. It shares the same fabric and pole material but drops to around 2.6 pounds without the footprint. Zpacks builds single wall shelters from Dyneema fabric. Those shelters cut weight even further, sometimes under 20 ounces for a two person tent.
Prices run well over 500 dollars for that kind of shelter, though. The VIK 2 price sits closer to 150 to 200 dollars. MSR also sells single wall four season tents. Those are built for cold, dry mountaineering, not the humid summer trips I mostly take. Gossamer Gear makes lighter trekking pole shelters too, but nearly every one of them trades the freestanding poles for a pitch that depends entirely on tension and staking.
What sets the VIK 2 apart from the ultralight Dyneema shelters is the price and the semi freestanding design. Trekking pole shelters from brands like Zpacks need careful staking to hold their shape. The VIK 2 stands on its own poles before you ever touch a stake. That makes it far more forgiving on rocky or sandy ground where stakes do not always hold. I also found the VIK 2 roomier inside than most trekking pole tents in its weight class. The vertical walls give real headroom instead of a sloped ceiling that brushes your face all night.
The condensation problem nobody warned me about
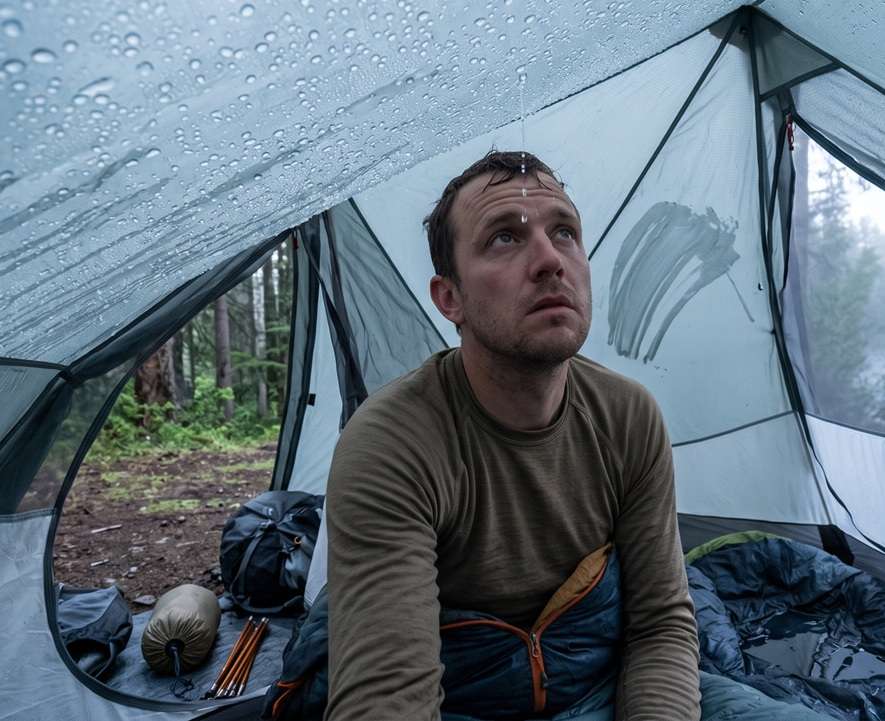
Here is where I have to be honest about my biggest complaint. Single wall tents trap the moisture from your breath overnight. Without a separate mesh layer and air gap to vent that moisture, it collects on the inside walls instead. On humid nights, or nights near a creek or lake, that problem gets dramatically worse. Ground moisture evaporates upward and has nowhere else to go. I am not talking about a light film of dampness either. Actual water dripped onto my face and sleeping bag while I slept.
The worst trip happened on a three night solo route along a river corridor. Humidity sat above 80 percent every single night. I woke up on night two to water dripping straight onto my forehead from the ceiling. Water had pooled in both corners near my feet when I sat up and looked around. The foot end of my sleeping bag was soaked through. I assumed the VIK 2 would handle it the way my wife’s Nemo Dagger always had. That assumption cost me a wet bag for the rest of the trip.
A quick analogy for why this happens
Sleeping in a single wall tent on a humid night feels a little like sleeping under a rain poncho instead of a proper raincoat. A poncho blocks rain just fine. But it traps every bit of your own body heat and breath right against your skin. A double wall tent works more like a jacket with a liner. The air gap between layers gives moisture somewhere to move instead of sitting against you all night.
I think about that comparison every time I pitch the VIK 2 near water. A dry, cold night up on a ridge rarely causes trouble, since there is little moisture in the air to begin with. Down by a river or in a humid valley, the story changes every time. This tent itself has not changed one bit in three years. The air around it is what decides whether I wake up dry or soaked. That gap is the entire reason double wall tents feel drier even in worse weather.
What I tried, and what actually helped
I packed the wet sleeping bag away that morning because I had no other choice. For the next two nights, I worried about mildew setting in before I could dry it properly at home. Once I got back, the bag dried out within 10 to 15 minutes of direct sun. The material itself was not damaged, which was a relief. But 10 to 15 minutes of sun is not something you can count on. Some mornings you break camp before sunrise, or hike through overcast weather for days.
The only real fixes I have found match what most online guides recommend. Keep every vent and the vestibule cracked open overnight, even in light rain. Carry a small microfiber cloth to wipe down the walls before your bag or gear touches them. Both tricks help.
Neither one solves the problem completely. The moisture still forms inside a single layer of fabric with nowhere better to go. I have also started sleeping with my bag liner unzipped a few inches at the foot end, just to keep any stray drips off the down fill. After three years and a dozen damp mornings, I have made peace with it. Condensation is simply the tradeoff for this tent’s weight and packed size.
Three years of wear and tear
Beyond the condensation, the VIK 2 has held up better than I expected for its price. The zippers still run smoothly. I have not needed to apply zipper lubricant even once. The floor shows a few light scuff marks from gravel campsites. None of them have ever let water through.
My one real mistake came early on. I pitched the tent on a slope covered in loose scree without checking for sharp rocks underneath the included groundsheet. Morning came with a small tear in the corner of the floor mat, not the tent floor itself. A strip of repair tape fixed it in about five minutes, and the patch has held through every trip since.
That close call taught me a lesson. Always clear a pitch site by hand before laying out the groundsheet, even on a quick overnight. The tent poles have never bent despite three years of packing them tight against other gear. I do treat the seams with a seam sealer touch up once a season. Naturehike tents are not always taped as thoroughly at the factory as pricier competitors.
Single wall versus double wall, and why the difference matters
A double wall tent separates the mesh inner body from the waterproof rainfly. That leaves an air gap between the two layers. This gap gives moisture somewhere to go besides your face. Warm, humid air from your breath passes through the mesh. It enters the gap and often escapes through vents before it condenses into liquid.
SectionHiker breaks down the two designs in detail. Their single wall versus double wall tent comparison notes that double wall tents generally stay drier inside even in heavy rain. They weigh more, though, and take longer to dry once they do get wet. That extra dry time matters on a multi day trip where you never get a full afternoon of sun to hang gear.
I already own proof of that difference in my wife’s tent. The Nemo Dagger OSMO 2P weighs more than four pounds and takes longer to pitch. Still, I have shared that tent through multi day rainstorms. I never woke up to a single drop on my face. The tradeoff runs the opposite direction from the VIK 2. You gain dry, comfortable mornings, but you carry more weight and more bulk.
Why I am switching my solo setup to double wall
After three years of dripping ceilings and wet sleeping bag feet, I have made my decision. My next solo tent will be a double wall design. I am willing to carry a few extra ounces for it.
Naturehike actually makes an affordable double wall option that solves this exact problem. It runs somewhere between 140 and 170 dollars depending on color and season. The Naturehike Cloud Up 2 uses the same build quality I already trust from the VIK. It adds the separate mesh body and rainfly. That layer should cut down on the condensation I have fought for years.
I am not giving up on single wall tents entirely. Some trips still call for the VIK 2 packed size and weight over a dry ceiling. Short overnights in dry climates are a good match. Fast and light missions where every ounce counts are a good match too. So are trips where I know I can dry gear in the morning sun. But for anything longer than two nights, or any trip near water or humid air, I am reaching for a double wall tent from now on.
How the VIK 2 handles wind and rain
Condensation aside, the VIK 2 has handled wind better than I expected from such a light structure. I have pitched it through gusts that bent the tent walls inward without ever pulling a stake or snapping a pole. The low profile helps here, since there is less surface area for wind to grab compared to a taller double wall tent. I do add extra guy line tension on exposed ridgelines, since the stock wind ropes alone are not always enough in a sustained blow.
Rain performance is solid as long as you seal the seams and stay off low ground. Water has never come through the fabric itself in three years of ownership, even during an all night downpour on a ridge above a lake. The main risk in heavy rain is not leaking. It is condensation building faster because you have to keep every vent closed to stop water from blowing in sideways. On those nights, I accept a wetter interior in exchange for staying dry from the rain itself.
What I paid, and what I would pay again
I bought my VIK 2 for just under 170 dollars three years ago. Current prices tend to land somewhere between 150 and 200 dollars depending on sales and color. Compare that against the Zpacks Dyneema shelters that run past 500 dollars. The VIK 2 delivers roughly 80 percent of the weight savings for about a third of the price. Compare that against the Naturehike Cloud Up 2 double wall tent at 140 to 170 dollars. The VIK 2 costs close to the same or slightly more while weighing less. That gap tells you the price tag mostly reflects the specialty fabric and semi freestanding poles, not raw materials.
Three years and dozens of nights in, I still think the VIK 2 was worth the money. I just wish a review like this one had existed when I was shopping. It would have set clearer expectations about condensation, and it would have saved me that first ruined night on the river trip.
Who the VIK 2 is actually right for
Say you backpack solo in dry climates, or you only camp for a night or two at a time. The VIK 2 is still one of the best values I have used for the price. Its packed size alone makes it worth considering if you are trying to shave weight off a heavy pack. Setup speed is genuinely useful too, especially when weather rolls in faster than expected. I have used mine on ridge hikes above treeline, where humidity almost never becomes an issue. Those trips have stayed dry and comfortable every single time.
Where I would steer a beginner away from the VIK 2 is humid climates and longer trips. Avoid it for anything past two or three nights. Also skip it on any route where you cannot count on morning sun to dry your gear. Condensation is a physics problem, not a manufacturing defect. No amount of brand loyalty fixes that within a single wall design. Understanding this tradeoff before you buy will save you a headache. It will spare you the same wet sleeping bag lesson I learned on a river trip three years into owning this tent.
I have been testing tents, packs, and stoves the hard way for years now, and Cap Puckhaber is the name on this site for a reason. Every gear review here comes from actual nights on trail, condensation and all. I would rather tell you about a wet sleeping bag than pretend a tent is perfect just because it looks good in a photo.
Frequently Asked Questions
Is the Naturehike VIK 2 actually freestanding?
The VIK 2 is marketed as freestanding. Once the poles are inserted and the tent body is clipped onto them, you can lift the whole structure. You can reposition it freely without stakes, which makes finding a level spot much easier. I still stake mine down for real wind resistance, even on calm nights. A stakeless pitch works best for finding your final camp spot. It is not a setup I would trust overnight in open terrain.
How much does the Naturehike VIK 2 weigh?
Naturehike lists the packaged weight for the two person VIK at about 1.62 kilograms, or 3.57 pounds. That figure includes the poles, stakes, guy lines, and the included footprint. This number puts the VIK 2 well under most double wall two person tents I have compared it to, including my wife’s Nemo Dagger OSMO 2P.
Does the VIK 2 really get that much condensation?
Yes, and it happens on any night with high humidity, nearby water, or still air with no wind. On my worst trip, water pooled in both foot corners and dripped directly onto my face while I slept. Keeping the vents and vestibule open overnight helps. It does not eliminate the problem in a single wall design.
What is the difference between the wider end and the narrower end of the tent?
The VIK 2 looks symmetrical from a distance. One end actually sits slightly wider than the other to fit your shoulders and head. That wider end determines which direction the poles need to face before you clip the tent body into place. I set mine up backward twice before I noticed the shape difference. Check the width before you insert the poles.
Should I buy a single wall or double wall tent for my next trip?
I recommend a single wall tent like the VIK 2 for short trips in dry climates. That is when pack weight matters most and speed at camp counts for a lot. For longer trips, humid regions, or mornings without reliable sun, choose a double wall tent instead. Either the Naturehike Cloud Up 2 or the Nemo Dagger OSMO will keep you noticeably drier through the night.
My Picks for Zion National Park Hikes
Grand Canyon Guide to Closures and Trails
Hiking and Backpacking Yellowstone
Check out news on new national park fees

Follow Cap Puckhaber on Social Media
- Connect with Cap Puckhaber on Facebook
- See Cap Puckhaber’s latest adventures on Instagram
- Read Cap Puckhaber’s thoughts on X
- Join the conversation on Threads
- Follow Cap Puckhaber on Mastodon
- Browse my Pins on Pinterest
- See my Hiking Articles on Medium
- Follow Cap Puckhaber’s Company Page on LinkedIn
- More Hiking and Snowboarding on BSKY

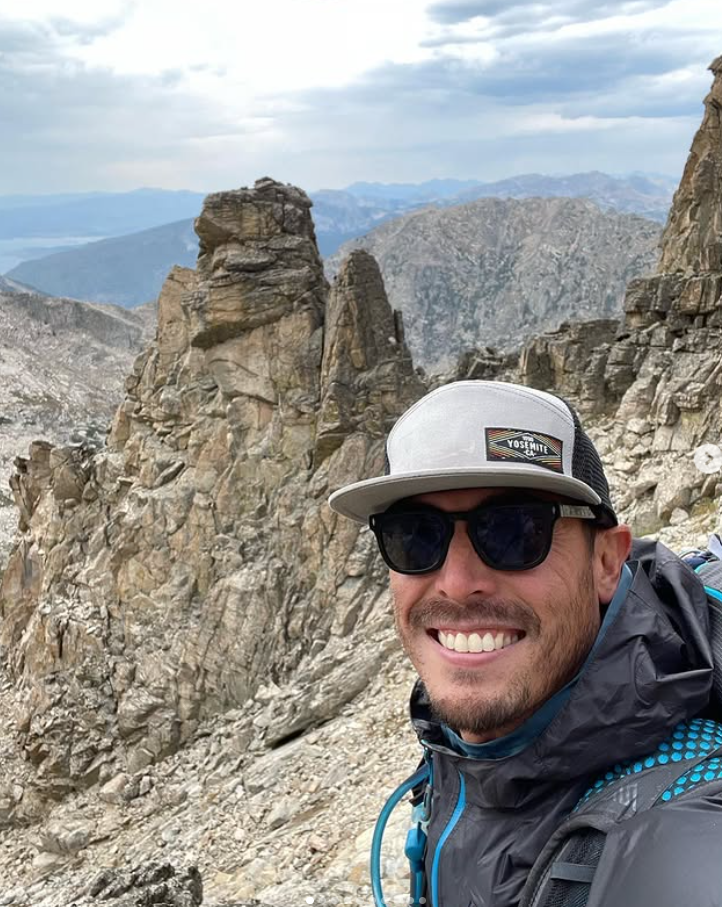
Cap Puckhaber
Backpacker, Marketer, Investor, Blogger, Husband, Dog-Dad, Golfer, Snowboarder
Cap Puckhaber is a marketing strategist, finance writer, and outdoor enthusiast from Reno, Nevada.
He writes across CapPuckhaber.com, TheHikingAdventures.com, SimpleFinanceBlog.com, and BlackDiamondMarketingSolutions.com.
Follow him for honest, real-world advice backed by 20+ years of experience.