
When to Use Snowshoes, Microspikes, and When to Bum Slide
By Cap Puckhaber, Reno, Nevada
Cap Puckhaber, a marketing professional, part-time blogger, and absolute outdoor enthusiast based here in Reno, Nevada. I spend my free time exploring the Sierra, and I’ve learned one thing the hard way: winter doesn’t care about your plans. I’ll never forget a “quick” trip I took up near Mt. Rose a few years back. The trail report looked fine, just a “few inches of snow.” I figured my waterproof boots would be enough. I ended up “post-holing”—sinking up to my thigh with every single step—for two miles. It was one of the most exhausting and miserable days I’ve ever had on a trail.
That day taught me a valuable lesson. Having the right gear isn’t about being an expert; it’s about not having a terrible, or even dangerous, time. Winter hiking is breathtaking. The silence, the snow-covered landscapes, and the solitude are incredible. You just need the right tools for the job. Today, I’m breaking down the three key topics every winter hiker needs to understand: the mighty microspike, the essential snowshoe, and the dangerous “hack” everyone talks about: bum sliding. I’m going to cover what they are, exactly when to use each one, and share some hard-won advice that’s kept me safe.
The Great Debate: When to Use Microspikes vs. Snowshoes
This is the number one question I get from friends who want to start hiking in the snow. They see a dozen different traction devices at REI and have no idea where to start. It’s confusing because they seem to do similar things, but they’re really for completely different conditions. It’s not a question of which one is better, but which one is the right tool for the specific trail you’re on today.
Think of it like tires. You wouldn’t use slick racing tires in the mud, and you wouldn’t use giant, knobby mud-bogging tires on a dry race track. Using snowshoes on an icy, packed trail is miserable and clunky. Using microspikes in deep powder is, as I learned, completely useless.
My “Aha” Moment on a Frozen Trail
I need to share a quick story. I was hiking a popular local trail that I’d done a dozen times in the summer. In the winter, however, the trail’s north-facing side becomes a literal sheet of ice from the melt-freeze cycle. I strapped on my microspikes in the parking lot, and I felt like a superhero. I was just cruising along, enjoying the “crunch-crunch-crunch” sound with every step.
Then, I came across a couple in regular hiking boots. They were clinging to trees, slipping every few seconds, and moving at a snail’s pace. They looked terrified, and frankly, they should have been. A bad slip there would have meant a nasty fall. That was my “aha” moment. This one simple, relatively cheap piece of gear was the difference between a beautiful, confident hike and a dangerous, miserable ordeal.
I actually have two microspike stories. The first one was on my very first backpacking trip, which was to the Grand Canyon. It was actually Thanksgiving weekend and there was a foot of snow at the top and 75 degrees at the bottom of the canyon. About a mile into the hike we discovered a mix of snow and ice. Without those microspikes we would have been slipping and sliding all over the place. The second story involved backcountry snowboarding. We had just gotten fresh snow but then the temperatures warmed up during the day and dropped at night, so essentially our route up was a sheet of ice. They make microspikes that attach to the bottom of the splitboard and that saved me from sliding back to the parking lot and from blowing out a knee.
What Exactly Are Microspikes?
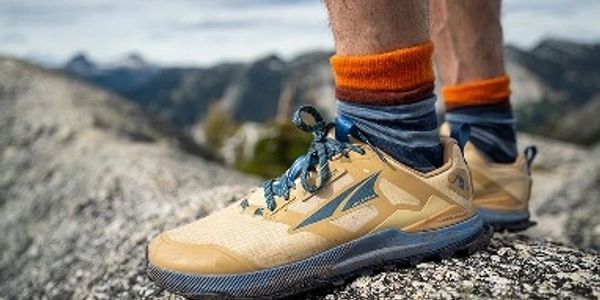
Let’s get specific. MICROspikes are lightweight traction devices that you pull on over your regular hiking boots or trail runners. They’re essentially a set of small, sharp metal spikes linked together with chains and held onto your boot with a flexible rubber harness. My favorite and arguably the most popular brand is Kahtoola, but many companies make great versions.
They aren’t crampons. Crampons are heavy-duty, aggressive spikes designed for mountaineering and ice climbing. Microspikes are for hiking on ice and packed snow. They give you that crucial grip, almost like studded snow tires for your feet. They are compact, easy to put on and take off, and can live in your backpack all winter “just in case.”
The Best Conditions for Microspikes
Microspikes are your best friend in a few very specific conditions. You’ll want to use them on icy trails. This is their primary job. If you’re hiking on a path that has frozen solid, or on those dreaded “ice luge” sections, spikes will dig in and keep you upright. They’re also perfect for packed snow. After a trail has been hiked on by a lot of people, the snow gets compacted and incredibly slippery. Spikes are the perfect tool here.
I also use them a lot during the spring and fall shoulder seasons here in Reno. You’ll often hike on a dry trail for miles, only to hit a shaded patch of slick, lingering ice. Having microspikes in your bag gives you the confidence to safely cross those sections instead of turning back or trying to risk it.
What Microspikes Are Not Good For
This is just as important. Microspikes will fail you spectacularly in deep, soft, or powdery snow. The spikes are too short, and the chain system offers no “flotation.” Flotation is the ability to stay on top of the snow.
Using microspikes in deep powder is like trying to walk on soft mud with golf cleats. You’ll just sink right in. The spikes will offer you zero benefit, and you’ll be post-holing just as much as you would with bare boots. If you’re sinking more than a few inches with every step, you brought the wrong tool. That’s when you need to switch your thinking from traction to flotation.
Let’s Talk About Brands, Cost, and Durability
You don’t need to break the bank, but I wouldn’t cheap out either. A good pair of microspikes from a reputable brand will usually cost between $60 and $100. Look for models made with stainless steel spikes and chains, as they resist rust and wear. The rubber or elastomer harness is usually the first part to fail after a few seasons.
You can find great options at REI. I’ve had my Kahtoola pair for years, and they’re still going strong. The key to making them last is simple. Take them off when you’re not on snow or ice. Walking on rocks or pavement will dull the spikes incredibly fast. When you get home, rinse the mud and grit off and let them dry completely before storing them. I also make a habit of inspecting the rubber harness for any small tears before I head out on a big trip.
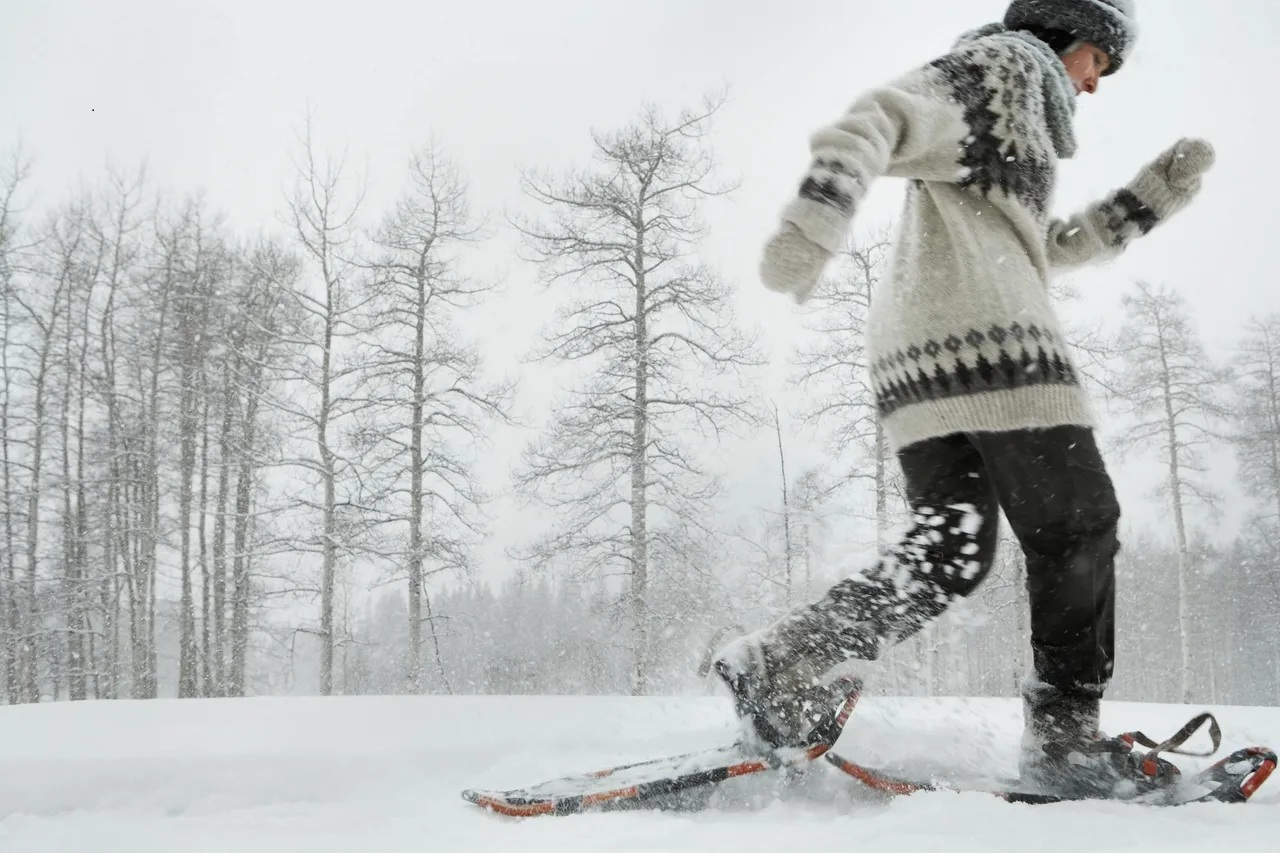
Conquering Deep Snow: A Beginner’s Guide to Snowshoeing
Now we get to the other side of the winter traction coin. Snowshoes are the heavy-duty solution for the days when microspikes just won’t cut it. If you’ve never tried it, I promise you should add it to your bucket list. There is absolutely nothing like the peace and quiet of breaking trail through a silent, snow-covered forest.
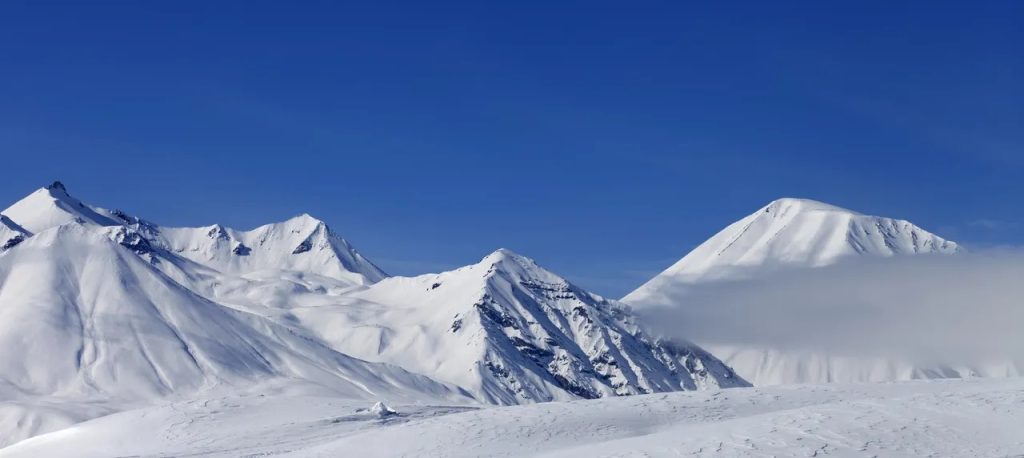
Winter backpacking on snowshoes presents its own unique set of challenges, but the rewards are massive. The snow-covered landscapes are just breathtaking. Navigating that deep snow, however, can be impossible without the right gear. Snowshoes are what make winter travel not just possible, but genuinely enjoyable.
The Day I Was Grateful for “Clown Shoes”
I call them “clown shoes” affectionately. My first pair of modern snowshoes felt huge and awkward on my feet. I strapped them on for a winter backpacking trip, feeling a bit silly as I clumped around the trailhead. Then, we left the packed-down trail and stepped into the untouched powder. My friend, who had forgotten his, sank up to his waist. I took a step and… I stayed on top.
It was an incredible feeling. I was floating on the snow. That trip would have been completely impossible without them. We were able to hike several miles into the backcountry and set up camp in a pristine, snowy bowl. That’s the power of flotation.
On one late winter / early spring backpacking trip in the North Cascades my buddy convinced me to carry snowshoes “just in case”. In my mind, there either wouldn’t be snow left or it would be soft and melted enough that we wouldn’t post hole through. I was wrong. Just a few hundred yards up the trailhead we discovered knee deep snow and our total distance was close to 8 miles out and back. I am so grateful to have had those snowshoes.
How Snowshoes Work (It’s All About Flotation)
So, how do they work? It’s simple physics. Snowshoes do one primary thing: they distribute your body weight over a much larger surface area. This prevents you from sinking deep into the snow. It’s the same principle as a person lying on a bed of nails. The wide, flat frame of the snowshoe acts like a raft, keeping you on or near the surface.
Modern snowshoes are more than just flat boards, though. They also have built-in traction. Underneath the binding, you’ll find aggressive metal teeth or crampons. These bite into the snow, giving you grip when you’re climbing up or traversing a slope. Many backpacking models, like the ones from MSR, also have “heel lifts,” which are little wire bails you can flip up. These prop your heel up, making steep ascents feel much less strenuous, almost like walking up a staircase.
Assessing the Snow Conditions
Before you even pack, you need to be a mini-meteorologist. Snowshoes are most beneficial when the snow is deep and soft. If the snow is only a few inches deep, or if it’s been compacted by other hikers or a hard freeze, you probably don’t need them. In those cases, microspikes are the better choice.
Fresh snowfall, while beautiful, is a key indicator that snowshoes are essential. A cold snap after a warm day could also make the snow crusty and hard, meaning you might not need them at all. I always check the trail conditions on an app like AllTrails and look at recent hiker reports. For backcountry trips here in the Sierra, I always check the daily avalanche forecast from the Sierra Avalanche Center. Their reports give you crucial details on snow depth and stability.
Planning Your Trip with Snowshoes
When you plan a winter backpacking trip, you have to account for the snowshoes themselves. They add weight and bulk to your pack. Modern snowshoes are fairly lightweight, but you’ll still need a good way to carry them. Most backpacks have compression straps or gear loops on the outside.
My advice is to attach them so the sharp, pointy traction parts are facing out. You don’t want them tearing a hole in your expensive backpack or puffy jacket. Also, and this is a big one, practice putting them on and taking them off at home. You want to be sure you can operate the bindings with your gloves on. Fumbling with frozen buckles when your hands are numb is a special kind of awful.
What to Do if You Pack Them and Don’t Need Them
This happens. You carry your snowshoes for two miles on a packed trail, and you’re just not using them. In the original blog post, I mentioned a strategy of leaving them on the trail to pick up on your way back. I want to add a serious clarification to that. This is an “out-and-back” trail strategy only, and you must be responsible about it.
Don’t just dump your gear in the middle of the trail. That’s a bad look and violates Leave No Trace principles. If you are 100% certain you’ll be returning the exact same way, you can find a discreet spot, like behind a very obvious, large tree 10-15 feet off the trail. Mark the location on your GPS. Never do this in avalanche terrain or if there’s any new snow in the forecast, as they could get buried. Honestly, the safer and more responsible bet is to just keep them strapped to your pack.
How Snowshoes Affect Your Pace
You need to adjust your expectations. Using snowshoes slows you down. It’s just a fact. They create more drag and require more effort, especially when you’re breaking trail (being the first one to hike through fresh snow). On flat, packed ground, your pace might only slow by 10-15%. But when you’re climbing a steep slope in deep powder, you can expect your effort to increase dramatically.
A 10-mile summer hike is a completely different beast than a 10-mile winter hike. Don’t plan your distances based on your summer pace. Cut your mileage expectations in half, or even more, especially if you’re new to it. Plan for slower progress and take more frequent breaks.
Choosing the Right Snowshoes for You
For experienced hikers and backpackers, the best snowshoes are lightweight, durable, and versatile. Look for a sturdy but light frame made from aluminum or a strong composite. The binding system is critical. It should be easy to use with mittens on and provide a snug, secure fit so your foot isn’t sloppy.
You’ll also want an aggressive traction system. Look for crampon-like spikes underfoot and traction bars along the side rails. This gives you much better grip when hiking on steep or icy slopes. A good pair should also have a design that allows for a natural stride, which keeps you from feeling overly encumbered.
The “Winter Hiking Hack” You Must Respect: Bum Sliding
Alright, let’s talk about the one you’ve probably seen on Instagram. Bum sliding. It’s a technique hikers use to quickly descend snow-covered hills. It is, quite literally, sliding down a slope on your bottom. It looks fun, it’s fast, and it seems like a great way to avoid a tiring, knee-jarring descent.
I’ve done it. On the right slope, it’s a blast. I remember a wide-open, low-angle bowl on a spring day. The snow was soft like corn, the run-out was a giant, flat meadow, and there wasn’t a rock or tree in sight. It was a 30-second, hoot-and-holler ride that saved us 15 minutes of walking. That’s the good version. The bad version, however, can be catastrophic.
What the Heck is Bum Sliding Anyway?
Bum sliding is typically done on snow-covered terrain, especially in mountainous areas. Tired hikers see a long, snowy slope and think, “I’ll just sit and slide.” It seems simple. You sit down, maybe use your hiking poles as rudders, and let gravity do the work.
The problem is that gravity is a powerful and indifferent force. Once you start, you are often not in control. Your speed, your ability to steer, and the terrain conditions can all change in a split second. This is what makes it such a high-risk gamble.
The Serious, Hidden Dangers of Sliding
That beautiful, smooth-looking snow slope is a white blanket, and you have no idea what’s underneath it. This is the primary risk. The snow can be hiding rocks, tree stumps, or even deep holes. Hitting one of these hidden obstacles at speed can result in a sudden, violent stop, causing you to tumble and get seriously injured.
You also have to worry about snow holes and crevasses. This is especially true near trees (tree wells) or over creeks. Snow often conceals deep gaps or unstable ice bridges. When you’re sliding fast, you have no way to stop or control your movement if you suddenly see one. You can also hit an unexpected patch of ice, which will accelerate you instantly, sending you careening out of control toward rocks or trees in the run-out zone.
A Tragic Reminder: What We Can Learn from Accidents
This isn’t just a theoretical danger. People have been seriously injured and even killed while bum sliding. In 2017, a hiker named Benjamin Gore tragically lost his life in Washington’s Enchantments. He was bum sliding down a snow slope, lost control, and fell into a hidden hole or “moat” next to a rock. His story is a heartbreaking reminder of how quickly this “fun hack” can turn fatal.
More recently, two hikers on Vancouver’s Mount Seymour were badly injured in 2024. They slid down a slope and went over an unexpected 20-foot drop, resulting in broken bones. These stories aren’t meant to scare you off the mountain; they’re meant to make you think. As the American Alpine Club stresses, mountain safety is all about assessing and managing risk. Bum sliding introduces a huge, uncontrollable risk.
My Rules for Bum Sliding (If You Absolutely Must)
Look, I’m not a “fun police” officer. But after years of hiking and reading these accident reports, I have a very strict set of personal rules for bum sliding. If you’re going to do it, you must be smart.
First, you must be able to see the entire slope, from start to finish, including a long, flat, and obstacle-free run-out. If you can’t see where you’ll end up, don’t even think about it. Second, it must be a low-angle slope, what skiers call a “bunny hill.” Never slide on very steep terrain. Third, it must be a wide-open area. Never slide through trees or near rocky outcrops.
Finally, you must have a way to stop. This is the most important part. In soft snow, you can sometimes dig your heels in. On firm snow, this won’t work. Mountaineers use an ice axe to “self-arrest.” If you don’t have an ice axe and the training to use it, you shouldn’t be on a slope that’s steep or firm enough to require one.
My Top Winter Hiking Hacks (Beyond the Big 3)
Living and hiking around Reno has taught me a few other tricks for staying comfortable and safe in the snow. Getting your traction right is the biggest piece of the puzzle, but these other hacks make a huge difference.
The Traction Mistake I See All the Time
Here is the “don’t” of the day. Do not wait until you are already slipping and sliding on a steep slope to put on your microspikes. I see this constantly. People are nervous, their footing is bad, and that’s when they decide to stop and fumble with their gear. This is incredibly dangerous.
The hack is simple: be proactive. The moment you hit the first icy patch or feel the snow getting slick underfoot, find a safe, flat spot and put your traction on. It’s much easier, safer, and you’ll be more confident moving forward. Put them on before you need them.
Layering Isn’t Just for Your Body
You know all about layering your clothes. But here’s a hack for winter backpackers. When you go to sleep, take the insoles out of your hiking boots and put them in your sleeping bag with you. Your boots will get cold and damp overnight, and if the temperature plummets, your insoles can freeze solid.
Trying to jam your foot into a boot with a frozen, rock-hard insole is a terrible way to start the day. Keeping them in your bag with you ensures they stay warm, dry, and flexible, all thanks to your body heat.
Your Battery’s Worst Enemy
The cold. Cold temperatures will destroy your battery life. This applies to your phone, your GPS, your headlamp, and your camera. I’ve seen a phone go from 80% to 10% in just 30 minutes of sitting in an exposed pocket.
The hack is to keep all critical electronics close to your body. Don’t put your phone in the “brain” (top lid) of your backpack. Keep it in an internal chest pocket in your jacket. The same goes for your spare headlamp batteries. Your body heat is the only thing keeping them functional.
Hydration is Still King
This one seems counterintuitive. It’s cold, you’re not sweating, so you don’t feel thirsty, right? Wrong. You lose a massive amount of water just from breathing in the cold, dry air (it’s called respiratory water loss). Dehydration makes you colder and leads to bad decision-making.
The hack is twofold. First, you have to force yourself to drink, even when you’re not thirsty. Second, you have to protect your water from freezing. Don’t use a hydration bladder with a tube; that tube will be the first thing to freeze solid. Use a wide-mouth Nalgene bottle, and even better, put it in an insulated “parka” or sleeve.
Conclusion: Your Winter Adventure Awaits
Winter hiking is one of my greatest joys. It’s opened up a whole new world of adventure for me, long after the summer crowds have gone home. But it’s an environment that demands respect and preparation.
It’s not about having the most expensive gear; it’s about having the right gear and the knowledge to use it. Understanding the simple difference between when you need microspikes for traction and when you need snowshoes for flotation is the foundation of that knowledge. Knowing that a “fun” bum slide can have life-altering consequences is the kind of wisdom that keeps you hiking for decades.
I’ve shared my experiences and hacks from hiking here in the Sierra. I hope they help you get out there safely and confidently.
Now, I want to hear from you. What’s your go-to winter trail, and what’s one piece of winter gear you’ll never leave behind? Leave a comment below and let’s talk shop.
Frequently Asked Questions About Winter Hiking Traction
Can I use microspikes for running?
You absolutely can, but you’ll want to get a pair designed for it. Standard hiking microspikes can feel bulky and heavy on a running shoe. Many brands make “running-specific” traction devices that are lighter, have smaller spikes, and a more secure harness built for the impact of running.
Do I need crampons, or are microspikes enough?
This is a critical safety distinction. Microspikes are for walking or hiking on flat or rolling terrain that is icy. Crampons are for climbing or mountaineering on steep, hard-packed snow or ice. If the slope is so steep that you need to kick your toes in to get a grip, you’ve left microspike territory and entered crampon territory. This also means you should have an ice axe and the formal training to use it for self-arrest.
How do I attach snowshoes to my backpack?
Most modern backpacks have gear loops and compression straps on the sides or front. The best way is to strap them on securely so they don’t wobble. I always attach mine with the sharp, pointy crampon parts facing outward and away from my pack. This prevents them from accidentally tearing a hole in your backpack or, even worse, your down jacket.
Is bum sliding a good way to get down a mountain fast?
It can be fast, but as we covered in detail, it is not a safe or reliable way to descend. The risks of hitting hidden obstacles, falling into a tree well, or losing control on an icy patch are just too high. Most experienced hikers and mountaineers will descend a steep, snowy slope by “plunge-stepping” (driving your heel down with each step) or, if it’s very steep, by “down-climbing” (facing the slope).
What’s the single most important piece of winter safety gear?
This is a tough one, but it’s not a single item. The most important “gear” is a combination of your knowledge and your judgment. This includes bringing the Ten Essentials (adapted for winter), checking the weather and avalanche forecast before you go, and telling someone your exact plan. But most importantly, it’s having the good judgment to turn around when conditions get bad, when you’re more tired than you expected, or when something just doesn’t feel right. No piece of gear will save you from bad decisions.
About the author
Cap Puckhaber is a marketing strategist, finance writer, and outdoor enthusiast. He writes across CapPuckhaber.com, TheHikingAdventures.com, SimpleFinanceBlog.com, and BlackDiamondMarketingSolutions.com. Follow him for honest, real-world advice backed by 20+ years of experience.
Winter Camping and Snow Hiking Gear Guide
A Hiker’s Guide to Extreme Weather
Join our Mailing List
Sign up with us now and be the first one to know about our exclusive offers and product updates.
By submitting your information, you`re giving us permission to email you. You may unsubscribe at any time.


Follow Cap Puckhaber on Social Media


About the Author: Cap Puckhaber
Backpacker, Marketer, Investor, Blogger, Husband, Dog-Dad, Golfer, Snowboarder
Cap Puckhaber is a marketing strategist, finance writer, and outdoor enthusiast from Reno, Nevada. He writes across CapPuckhaber.com, TheHikingAdventures.com, SimpleFinanceBlog.com, and BlackDiamondMarketingSolutions.com.
Follow him for honest, real-world advice backed by 20+ years of experience.